Saturday, 26 October 2013

Swordfish Steak on Fusilli Pasta Salad

Seared swordfish steak is served on a warm fusilli pasta salad

Swordfish is a beautiful eating fish, not dissimilar to tuna. It is not however always easy to get hold of and even where it is available, care should be taken to ensure the fish comes from a sustainable source. If you're buying swordfish in the United Kingdom, this is easily checked by looking in your supermarket or fishmonger's for the blue tick of the MSC (Marine Stewardship Council) which signifies compliance with this important factor.

The most important thing to remember when cooking swordfish is that it must never be overcooked. In a similar way to both tuna and salmon, it is served and enjoyed at its best when still slightly pink and ostensibly underdone in the centre. Cook it too much and it will become dry and overly flaky.
  
Simple Mediterranean style salad ingredients

Ingredients per Person

1 swordfish steak
1 medium tomato, seeded and finely diced
2 inch piece of cucumber, seeded and finely diced
3 large basil leaves, finely sliced (2 for salad and 1 to garnish)
1 clove of garlic, peeled and grated
1 tablespoon extra virgin olive oil, plus extra for frying swordfish
Salt and pepper
4 ounces dried fusilli pasta

Simple salad prepared for fusilli pasta

Directions

Begin by assembling the salad to give the flavours maximum infusion time. The tomato, cucumber, basil, garlic and olive oil are all combined in a bowl with some seasoning. Cover with clingfilm until required.

Fusilli pasta

Bring a large pot of heavily salted water to a rolling boil. Add the pasta, stir well but briefly and simmer for around ten minutes or until al dente.

Fresh swordfish steak

When the pasta is almost ready, drizzle some olive oil in to a small frying pan and bring it up to a high heat. Season the swordfish steak on both sides with salt and pepper and lay it in the hot pan.

It is important to watch the swordfish cook if it is to be cooked correctly. The time it will take to cook will depend upon the thickness of the steak. What you are watching for is the steak appearing to have cooked one-third of the way up the side. At this stage, it should be turned to cook a third of the way up the other side. This thin steak required only about one minute on each side.

Pan searing a swordfish steak

When the swordfish has been turned, drain the pasta through a colander at your sink and return it to the empty pot. Add the prepared salad and stir well with a wooden spoon. Taste and adjust the seasoning if required before stirring again.

Salad is added to drained fusilli pasta

Spoon the pasta in to a deep serving plate to form an effective bed for the swordfish.
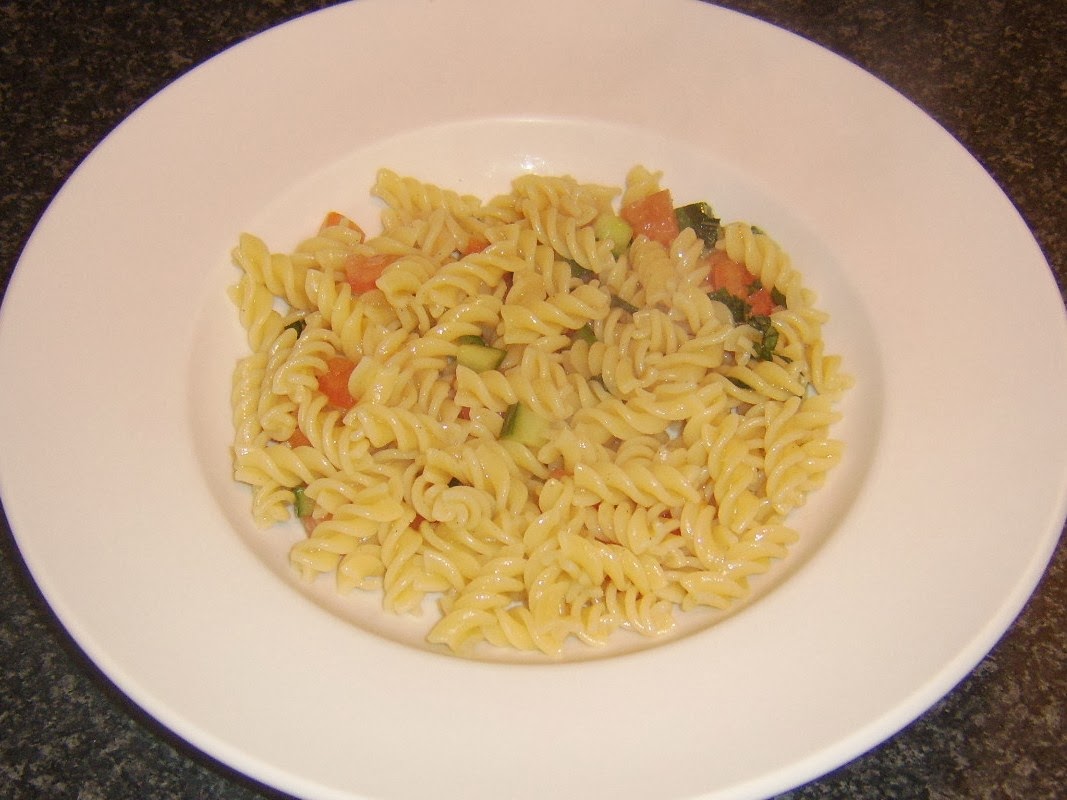
Fusilli pasta salad is plated to form a bed for the swordfish

Lift the swordfish on to the fusilli bed, scatter with the remaining basil strips and serve immediately.

Swordfish steak is laid on fusilli pasta salad

Tuesday, 15 October 2013

Rainbow Trout Fillets with New Potatoes

Pan fried rainbow trout fillets are served on a salad bed with buttered new potatoes

Rainbow trout is perhaps more often cooked whole by being baked in the oven. In this instance, however, although I bought the fish whole, I decided to fillet it myself and pan fry the fillets in a little oil and butter. I was not disappointed. I served the fillets incredibly simply on a bed of mixed salad leaves and with some boiled new potatoes.

Ingredients

2 rainbow trout fillets
8 to 10 baby new potatoes, or as required
Generous handful of mixed green salad leaves
2 tablespoons plain/all purpose flour
Vegetable oil
1 ounce (1/4 stick) butter, approximately
Salt and pepper
1/2 teaspoon dried dill

New potatoes are added to cold salted water

Directions

Start by washing the new potatoes but leave the skins intact. Add them to a pot of cold water along with a little sea salt. Put the pot on to a high heat until the water reaches a boil. Reduce the heat and simmer for half an hour or until the potatoes are just softened.

Supermarket mixed salad leaves

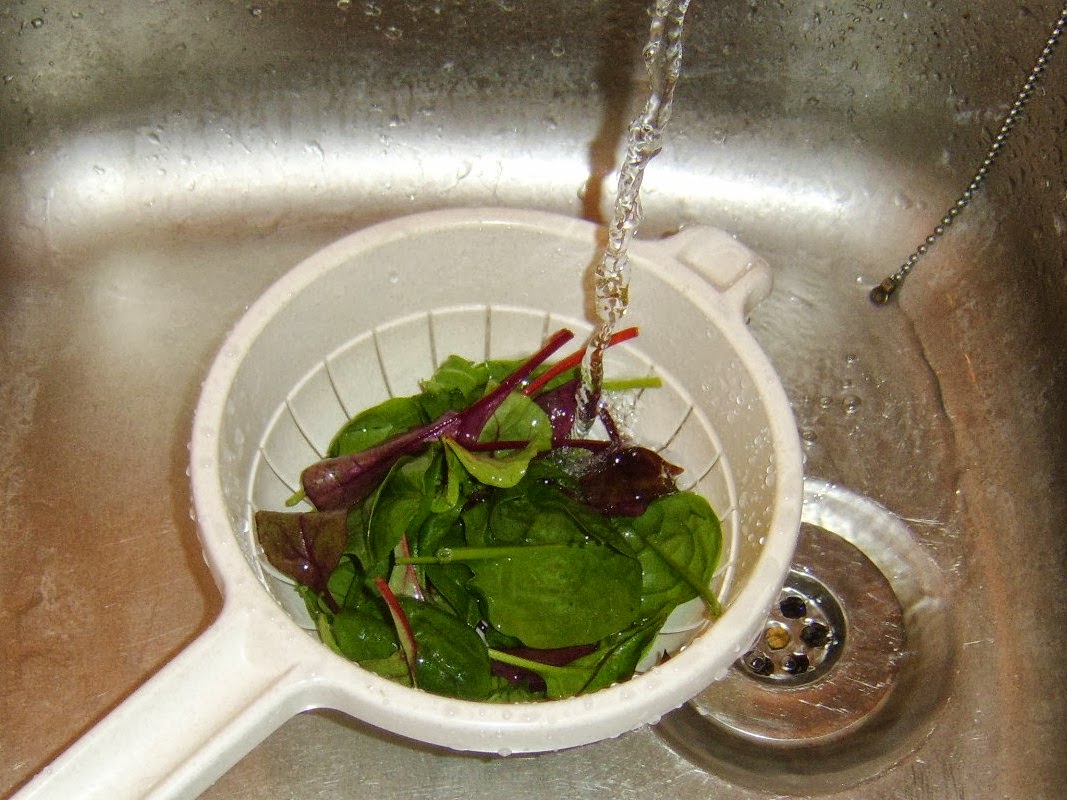
Supermarket salads like the one shown above consisting of spinach, rocket (arugula), red and ruby chard will often state on the packet that the leaves are washed and ready to eat. Never take this for granted. Always put them in to a colander and rinse them thoroughly under running cold water. Sit the colander aside on a draining board until the leaves are required.

Washing salad leaves in cold water

Spoon the flour on to a large dinner plate, season with salt and pepper and scatter evenly over the plate. Add a little oil and half the butter to a large, non-stick frying pan and put the pan on to a fairly high heat. Wash the trout fillets in a bowl of cold water (not under running water or you may damage them), pat them carefully dry and pat the skin sides only in the seasoned flour.

Trout fillets are patted in seasoned flour on skin sides

When the butter is melted and the oil is fairly hot, lay the trout fillets in the pan, skin sides down. Continue to cook on a fairly high heat as the idea is to crisp up the skin. Don't worry - the skin will protect the flesh from overcooking.

Pan frying rainbow trout fillets

When you can see by looking at them that the fillets are almost cooked (roughly three minutes but the visual test should always be the acid test) you should switch the heat off completely, push the pan to a cool part of the stove-top and only then carefully turn the fillets with a spatula or fish slice on to the flesh sides. Leave them to complete cooking in this way while you drain the potatoes and prepare them for serving.

Butter and dill are added to boiled new potatoes

Drain the potatoes through a colander at the sink and return them to the empty pot. Add the remainder of the butter and the dill. Swirl the pot to combine. Plate the salad with the potatoes and carefully lay the trout fillets, skin sides up, on the salad bed. You will find that the skins peel easily away from the fillets leaving the delicious, moist flesh ready to eat.

Crisp skin peels easily from pan fried rainbow trout fillets

Monday, 7 October 2013

Roast Woodcock in Red Wine Sauce

Roast woodcock in red wine, rowan berry and apple sauce

Woodcock is I believe one of the most delicious of all the game birds and I say that as someone who has tasted a great many different types of wild game. The obvious problem, however, is that they are incredibly small and probably at least two are required per person to represent an even semi-decent main course portion. What this recipe offers, therefore, is a very enjoyable starter or appetizer suggestion.

There is a tradition when cooking woodcock that the head be left on the bird and the guts intact. The neck is twisted around and the beak used to pin the legs and wings in place as the bird is roasted. The guts dissolve during the period spent in the hot oven and form part of what becomes a rich, luscious sauce. While I have eaten and very much enjoyed woodcock prepared and cooked in this way, on this occasion I decided to remove the head and innards before it was roasted.

A whole, plucked woodcock

Ingredients per Person

1 plucked woodcock
2oz butter
1 small glass red wine (Shiraz was used in this recipe)
1 tablespoon rowan and apple jelly
Salt and pepper
Freshly chopped parsley to garnish

Feet are chopped from woodcock

Directions

It may be that you source your woodcock from a supplier who will undertake the cleaning process on your behalf. Be aware, however, that they usually come plucked and nothing else, for reasons already explained. This means that you should have some idea of how to clean these little birds (if desired) before they are cooked.

Head and neck are chopped off woodcock

I began by chopping the feet off at the knees. Essentially, cut at the joint where you can see the meat begins/ends. You should then cut off the head and neck, right at the point at which it joins the main body.

Guts are removed from woodcock

Again because woodcock are so small, it's not easy to clean out the body cavity without damaging the structure of the bird. The way I do it is by using my index finger to poke inside and draw out the organs. This is much safer than using a knife or any other form of tool and works very well. You should then wash the body of the bird in cold water and pat it gently but thoroughly dry with kitchen paper.

Woodcock is browned on either side

Before you start cooking your woodcock, make sure your oven is preheated to 220C/450F. It is vital that the bird(s) go straight in to a very high oven heat.

Melt the butter in an ovenproof frying pan and brown the woodcock on both sides. Add the red wine and the rowan and apple jelly and heat until what will become the sauce is just simmering. Baste the woodcock well and put the pan in to the oven.

Red wine and rowan and apple jelly are added to browned woodcock

The woodcock should be in the oven for a total of twelve minutes but you want to take it out and briefly baste it about every three minutes. Remember to use oven gloves when lifting the frying pan as the handle will become ultra hot! It's all too easy to forget about this when you are lifting what is after all a frying pan.

Roast woodcock is rested before it is served

As with any other type of meat, it is vital to rest the woodcock when it comes out of the oven. Give it a minimum of five minutes.

Red wine, rowan berry and apple sauce for roast woodcock

A deep serving plate is desirable for serving a woodcock prepared in this way. Begin by spooning the sauce in to the bottom.

Roast woodcock is laid in bed of sauce

Lay the woodcock on the sauce before scattering with the roughly chopped flat leafed parsley to garnish. Tuck in and enjoy...

Tucking in to roast woodcock with red wine, rowan berry and apple sauce

Thursday, 12 September 2013

Spicy Chicken and Peppers Pizza Omelette

Half spicy chicken and pepper pizza omelette served with homemade chips

Pizza omelettes are a delicious combination of two popular fast foods that can also serve as an excellent way of using up leftovers. The potential inclusions are almost limitless and this particular recipe adaptation was devised as a means of using up some leftover roast chicken in my fridge. Pizza omelettes are much quicker and easier to make from scratch than conventional pizzas but although different, can be made to be equally delicious.

Chillies and bell peppers for spicy pizza omelette


Ingredients for this Pizza Omelette (Serves Two)

4 large eggs
4 ounces (approximately) of leftover, cooked chicken
1 red chilli pepper, sliced
1 green chilli pepper, sliced
2 slices (seeded) each from green, red and yellow/orange bell peppers
3 ounces cheddar cheese (coarsely grated)
1 ounce (1/4 a stick) of butter
Salt and pepper
Homemade chips to serve

Chillies and bell peppers are sliced for pizza omelette

Directions

Break the eggs in to a bowl and beat with a fork or small whisk until just combined. Stir in the chicken, broken in to small pieces.

Chicken and egg combination is added to omelette pan

Melt the butter gently in an (ovenproof) omelette pan or non-stick frying pan and pour in the chicken and egg combination. Cook on a medium heat, drawing the egg in from the sides towards the centre only until it starts to set. Put your grill/broiler on to preheat to its highest setting.

Chilli pepper slices are laid on almost set pizza omelette

When the omelette is almost but not quite completely set, season with salt and pepper then evenly lay the chilli pepper slices over the top.

Bell pepper slices are laid on set chicken pizza omelette

The bell pepper slices should then be arranged on top of the chillies.

Grated cheese is scattered over spicy chicken pizza omelette

Scatter the cheese evenly over the top of everything by hand.

Cheese is melted over spicy chicken pizza omelette

Put the frying pan under the grill/broiler for a minute or so until the cheese is melted and bubbling.

Spicy chicken pizza omelette ready for slicing and serving
Just as with pizza, a pizza omelette should never be cut while in the pan as this can permanently damage the pan. Slide it instead on to a chopping board for this purpose. Cut it carefully in half and plate along with the homemade chips.

Half the spicy chicken pizza omelette is plated

Saturday, 17 August 2013

Chicken Fritters Roll with Roast Potatoes

Chicken fritters with garlic dressing in a bread roll with roast potatoes

Chicken fritters like these ones are made from strips of fresh chicken breast fillet. They are deep fried in a simple batter to produce delicious, tender, succulent chicken in a crisp and crunchy shell. While it may be more common to serve an almost burger style creation like this with chips or fries, these tasty garlic and chive roast potatoes made a scrumptious alternative on this occasion.

Ingredients per Serving

1 skinless chicken breast fillet
2 tbsp self-raising/rising flour
Salt
Milk
Vegetable oil for frying
1 bread roll or burger bun
Squeeze of garlic and herb salad dressing
Garlic and chive roast potatoes to serve

Preparing batter for making chicken fritters

Directions

Spoon the flour in to a flat-bottomed bowl and season with salt. Very slowly, start pouring in milk as you whisk with a fork until a batter the consistency of double/heavy cream has been formed.

Deep frying pan of oil for frying chicken fritters

Add about an inch and a half depth of vegetable oil to a deep frying pan and bring it up to a high heat. Slice the chicken breast fillet lengthwise in to three portions. Dip each chicken strip in turn in to the batter and briefly allow the excess to drip off before gently depositing in the hot oil.

Chicken fritters are drained on kitchen paper

Fry the fritters for about five minutes, turning occasionally with a deep frying spider, until the batter is crisp and a burnished golden colour. Lift to a plate covered with kitchen paper to drain off the excess oil and allow them to become even more crisp and dry.

Toasted bread roll

Cut the bread roll or burger bun in half and lightly toast on the cut sides. Lay on a serving plate as shown.

Chicken fritters are laid on bread roll and plated with herb roast potatoes

Lift the chicken fritters on to the bottom half of the roll and plate the roast potatoes. Squeeze the garlic and chive dressing over the fritters and lay the top of the roll in place to serve.

Chicken fritters on bread roll with garlic and chive roast potatoes

Wednesday, 7 August 2013

Pan Fried Cod Fillets with New Potatoes

Cod fillets are simply pan fried and served with new potatoes and salad

This is a really simple way of cooking fresh cod fillets to perfection. This is a codling which I caught myself and carefully filleted. It is essential for this recipe that if you are buying the cod fillets, you be sure to get them with the skin still on.

Larger cod fillet was halved for frying

Ingredients

1 large or 2 small cod fillets (skin on)
5 new potatoes (or as required)
1 tablespoon plain/all purpose flour
Salt and pepper
Vegetable oil for frying
Little bit of butter
1 teaspoon chopped chives
Handful of green leaf salad combination of choice
1 tablespoon canned sweetcorn (drained)

Cod fillet skin sides are dusted with seasoned flour

Directions

Put the potatoes in to a pot of cold, salted water. Bring the water to a gentle simmer until the potatoes are soft. This will usually take somewhere in the region of about twenty-five minutes.

Scatter the flour on a plate and season. Bring a couple of tablespoons of vegetable oil up to a medium heat in a frying pan before patting the skin side only of the cod in the seasoned flour. Gently shake off the excess flour and lay the cod in the pan skin side down.

Butter and chopped chives are added to the drained new potatoes

The cod should be fried for a few minutes on the skin side until you can see it is almost done. While this is happening, drain the potatoes and return them to the pot with the butter and chives. Gently swirl the pot or stir with a wooden spoon to coat the potatoes in the herb butter.

Salad bed for cod fillets is plated

Reduce the heat under the frying pan and turn the cod carefully on to its flesh side for a minute or so to complete cooking. Lay the salad on your serving plate where it will become a bed for the cod.

Cod fillets are laid on salad bed

Lift the cod with a spatula on to the salad and spoon the sweetcorn on to the plate. Add the potatoes immediately before service.

Note that the nicely crisped skin should easily peel away from the cod flesh.

Crispy skin peels easily from cod fillets