Friday, 4 June 2010

The Unofficial World Cup of Food 2010 - Update

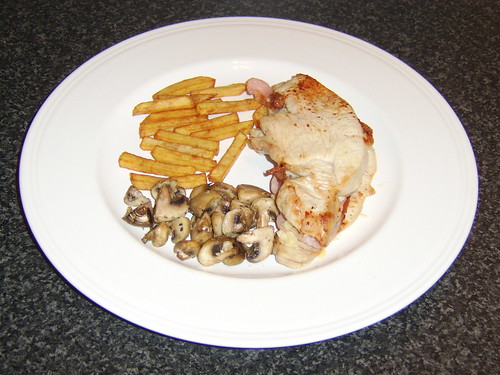
It is precisely one week today that the biggest sporting event of all, the FIFA World Cup, kicks off in its nominated destination for 2010, South Africa. This is the first time that the four-yearly tournament has ever been held on the African continent and it is likely to prove to be something special, for that fact alone.

As advised a couple of weeks back, I have decided to invite and engage the assistance of a number of food writers from around the world to showcase their talents on this blog during the month long tournament, preparing a dish representative of their respective countries, on a date upon which their country is actually playing a match. I have labelled this project, "The Unofficial World Cup of Food 2010." I hope that you will pay a return visit to see some of the dishes prepared in relation to this project and meet some of those people who will be creating them. With this in mind, below is a short guide to some of the writers who will be featured in the first week (approximately) of the tournament and the countries they will be representing... I have to keep some things back as a surprise!

Saturday, 12th June

This one day had to be a special one, for the reason that England and the USA open their campaigns against each other. As the majority of readers of this blog are in one of those two countries, I decided to feature both!

Cooking for England will be Marie Rayner and for the USA, The Thrillbilly Gourmet (aka DixieMockingbird).

Sunday, 13th June

Representing Germany will be Chef Keem, sharing with us some Bavarian delights, which I personally love so much.

Thursday, 17th June

Colene Pefley from the USA has kindly agreed to, "Guest," feature on behalf of Mexico, a country of which she has substantial knowledge of the food and culture.

Saturday, 19th June

This day will see Susanna Duffy cook for Australia, as her country goes up against Ghana on the field of play.

The 2010 World Cup is likely to be a very different spectacle for me personally from the 2006 tournament in Germany. At this stage of the lead-up four years ago, I was counting down the hours until a couple of friends and I flew out to Munich to take in the first couple of weeks of the event. Unfortunately, only two of us actually made it out there but we set off with high hopes of actually getting match tickets, ideally for the Brazil v Australia game which was taking place in the city during the period of our stay. We were offered two tickets on the underground market - at a cost of US$2,000 each! Needless to say, we watched the match on TV in one of the city's biergartens...

It was my first taste of the true atmosphere of the World Cup and the multi-national, multi-cultural spirit which it incorporates. I will never forget until the day I die being one of two Scots sitting in the huge Michaelibad Biergarten in Eastern Munich on a beautiful, scorching hot day as Germany prepared to play a match. I think that we were the only two foreigners in the place and the roar as untold thousands of Germans rose for and sang, "Deutschland Uber Alles", certainly made the hairs stand up on the backs of our necks. It was a fantastic spectacle, however, and an incredible experience.

What will follow on this blog over the next few weeks is my humble attempt to bring some of that variety, entertainment and multi-culturalism to food. I hope that all who follow it are in some way at least educated and entertained.

The tournament itself? UK bookmakers Ladbrokes still make Spain the favourites to lift the trophy, followed by Brazil, Argentina, England and Holland, in that order. Time will of course tell...

Saturday, 29 May 2010

Alternative, Healthier Cod and Chips

Alternative Healthier Cod and Chips

Cod and chips is something which is sold in the UK in fish and chip shops, or perhaps as a traditional pub lunch. The cod will come more often than not in the form of cod fillets, deep fried in batter. Although I do love cod and chips - or haddock and chips, as is more common here in Scotland - served in this way, I genuinely very much prefer fish cooked in a healthier fashion such as that below, not just for its more healthful properties but because of the fact that I truly believe it is much tastier.

I have served the cod and chips in this instance with a basic salsa. The salsa ingredient quantities will provide for about four servings of cod and chips, or simply refrigerate any excess and enjoy it on sandwiches, or with other accompaniments over the next day or two.

Ingredients

Salsa

2 large beef tomatoes
4" cucumber
1 clove of garlic
1 red chilli pepper
1 tbsp extra virgin olive oil
Splash of white wine vinegar
Salt and pepper to taste

Cod and Chips (Per Person)

1 large cod loin fillet
1 large potato
2oz cheddar cheese
2 tbsp fresh breadcrumbs
Freshly ground black pepper

Method

The method I use to prepare chips has appeared on this blog several times before. In order to avoid repetition, the full instructions can be found by clicking here. Alternatively, they can be prepared by your own chosen method, particularly if time is short.

It is important, however, to try to prepare the salsa a couple of hours in advance, in order to let the flavours infuse. This is done simply by deeseeding the tomato, cucumber and chilli, peeling the garlic, finely chopping everything and mixing all the ingredients thoroughly together in a glass bowl. The bowl should then be covered with clingfilm and refrigerated until required. Avoid using a plastic bowl here, as the flavours may actually permeate the plastic.

The cooking time for the cod fillets will vary depending upon their size. The one which I have cooked here took about three minutes each side over a medium heat, fried in a little sunflower oil. It should be possible to see from the side of the fillet when it is cooked half way through, at which point it should be carefully turned, using a spatula or fish slice.

Cheese and Breadcrumbs on Cod FilletWhile the cod is gently frying, the cheese should be grated and the breadcrumbs prepared. They should be mixed together and seasoned up with black pepper. When the fish is cooked the breadcrumb and cheese mix should be scattered thickly over the top as shown in the photograph to the right. There is no need to take time to do this carefully, to try to ensure decent presentation - that can be attended to at the time of plating up, simply by scraping the excess bread and cheese away from around the edges of the fillet with the spatula, prior to lifting it carefully from the pan.

The frying pan should then be placed under a hot, overhead grill for a couple of minutes, until the cheese melts and the breadcrumbs begin to crisp. The cod may then be plated along with the chips and salsa and served.

It is not just cod which is delicious served in this way. Any firm fleshed, white fish - such as perhaps monkfish - would be delicious prepared in this fashion, though more delicate fish such as whiting or particularly lemon sole would be likely to be overpowered.

More Great Fish and Seafood Recipes for you to Enjoy

English chef Rick Stein is my favourite fish and seafood chef. Although there are a great many talented chefs of this type on TV and around the world, it is his genuine love of the produce which shines through for all to see and the simplicity with which he cooks the delicate ingredients so as not to overwhelm their flavours which makes Rick Stein's fish and seafood recipes so special for me.

Below are a couple of suggestions from Amazon.com and Amazon.co.uk through which you can prepare fish and seafood recipes in the delicious fashions described by Rick Stein.

Tuesday, 18 May 2010

Chicken Breast Fillet and Bacon Parcels with Roast Potatoes, Tomato and Cucumber

Chicken Breast Wrapped in Bacon with Roast Potatoes and Cucumber and Tomato

These chicken and bacon parcels are a miniature variation of a dish I have prepared for many years. I have served them here with roasted potatoes and an idea that I came up with quite literally on the spur of the moment for an attractive way to present tomato and cucumber. The ingredients for this dish are quoted for two people.

Ingredients

1 chicken breast fillet
8 rashers of bacon
2 large potatoes
4 small tomatoes
8 slices of cucumber (1/4" thick)
1 tbsp freshly chopped coriander (cilantro in USA)
Generous pinch of dried sage
Sunflower oil
Salt and pepper for seasoning

Method

The first step is to put the oven on to preheat to 400F/200C/Gas mark 6. The potatoes should be peeled and chopped in to approximately 1" cubes. They should then be added to a pot of cold water and put on to come to a boil and then simmered for around fifteen minutes.

When the potatoes are on, the chicken breast fillet should be cut in to four strips, lengthwise. Four rashers of bacon should then be laid out flat as shown and a fillet placed on each of them, topped with some coriander. A second rasher of bacon should be added in each instance and the parcels carefully wrapped by tucking the bacon edges underneath. The parcels should then be placed in to a casserole dish - very lightly oiled with sunflower oil - the lid put on and the dish put in to the oven for twenty-five minutes. A further tablespoon of sunflower oil should be added to a baking tray and the tray also added to the oven to preheat.

When the potatoes have been simmering for around fifteen minutes, they should be removed from the heat, drained thoroughly and then returned to the empty pot. Carefully but moderately firmly, the pot should then be shaken to fluff up the edges of the potatoes before they are added to the hot baking tray, carefully swirled in the oil and added to the oven for around ten minutes.

While the chicken and bacon parcels and the potatoes complete their cooking, the core and seeds of the cucumber slices shoud be carefully removed with a sharp paring knife and four slices arranged as shown on each plate. The tomatoes should be halved by carefully cutting in as far as the centre of each tomato around the central circumference at alternate forty-five degree angles. This is surprisingly a lot easier than it may sound or look but great care must be taken to protect your hand holding the tomato in the event of the knife slipping for any untoward reason.

A tomato half should then be placed on top of each slice of cucumber. The casserole dish containing the chicken and bacon parcels may then be removed from the oven and the parcels added, two to each plate. While the potatoes are still on the baking tray, they should be scattered with the sage, seasoned with salt and pepper and given one final, gentle swirl, before being plated up and the meals served immediately.

Comfort Food and Calorie Counting

Are you a lover of traditional comfort foods but concerned by what is frequently their high calorific values? This book of recipes examines how you can still enjoy such foods but make them much healthier by simply substituting certain ingredients for others, without compromising on taste!

Friday, 14 May 2010

The FIFA World Cup, 2010 (South Africa) - Special Food Feature Coming Soon!

The FIFA World Cup is the most eagerly anticipated sporting event on Planet Earth. The finals of the tournament take place once every four years, following an approximate two-year qualifying campaign, and last for one calendar month. Thirty-two nations from around the planet, all hoping for the glory of scooping the greatest sporting prize of all, the FIFA World Cup.

So what has the FIFA World Cup got to do with what any of us may intend having for dinner tonight, or indeed any night during the course of the tournament? Won't most people simply sit in front of their TV with some microwaved meal or some takeaway fast food? No doubt many will, but hopefully - with the indispensable assistance of some other food enthusiasts from around the world - I can encourage many of you to make a little bit of extra effort this time around and add a whole new dimension to your enjoyment of the FIFA World Cup.

In simple terms, what I intend to do - for the duration of the tournament - is feature a whole host of dinner suggestions from around the world, representative of one of the countries which happen to be playing a match that particular day. As World Cup tradition dictates that the first match of the tournament always features the host nation playing another country who happen to have been drawn in their group, Friday, 11th June, will feature something representative of South Africa. That was always my intention from the outset.

With regard to Saturday, 12th June, I initially appeared to have hit my first major snag. I am aware that the vast majority of readers of this blog are in either the UK or the USA. Although the UK does not compete as one team in the World Cup, England are featured and not only were England and the USA drawn in the same group (one in eight chance!) but they both play their first match on the same day...against each other! "Which to feature?" was my first thought...

Inspiration fortunately saved me in due course: why not feature both? Particularly as the day in question is a Saturday and a majority of people will have more free time than on a weekday, why not ask an American chef/cook to go up against an English chef/cook in advance of the match itself? Two very different dinner suggestions on the same day: two for the price of one! More details on that one to follow very soon...

I will update in advance on the blog which countries you can find represented on each day, throughout the tournament, as and when I can. I very much hope that whatever happens on the pitches around South Africa, the culinary diversities which we can and will explore here can be appreciated by all who view them.

As for the World Cup itself? At the time of writing, UK Bookmakers, Ladbrokes, make Spain the pre-tournament favourites, followed by Brazil, England, Argentina and Germany, in that order. Interestingly in this respect, no European team has ever won the World Cup when it has been hosted outwith the continent of Europe. Time will of course tell whether that is about to change...

Is your country one of the thirty-two who will contest the 2010 FIFA World Cup? Unsure? Click here for a list of the thirty-two nations involved.

"Waving Flag" - The Official Anthem of the FIFA World Cup, 2010

(Click on the arrow in the centre of the screen to play the video)


Can't wait to start planning your dishes? Maybe a different Gordon can help, via Amazon.com or Amazon.co.uk...?

Thursday, 6 May 2010

Leg of Duck with Plum and Ginger Sauce and Crispy Sweet Potatoes

Duck Leg with Plum and Ginger Sauce and Crispy Sweet Potatoes

I have come across two popular reasons why people turn up their noses at buying or eating duck legs. I have heard it said that duck legs are as tough as old boots and that duck legs have virtually no meat on them and are therefore not worth their purchase price. In the first instance, the simple answer is that any meat which is not cooked in the correct fashion has the capacity to become as tough as old boots. In the second, we have to ensure when purchasing duck legs - particularly smaller ones - that we are in fact purchasing both the leg and the thigh.

This delicious duck leg recipe is for two people.

Ingredients

2 organic, free range duck legs and thighs
6 ripe plums
1 red bell pepper
1 glass of red wine
1" ginger stem
2 large sweet potatoes
Frozen peas

Method

The oven should be put on to preheat to 350F/180C/Gas mark 4. The skin side of the duck legs should then be pricked several times with a fork and they should be placed, skin side down, in to a dry, non-stick frying pan and brought up to a medium heat. The duck fat will be released through the holes made by the fork and the skin should brown up nicely in the space of around five minutes.

While the duck legs are browning, the plums should be halved and de-stoned, the red bell pepper should be sliced and the seeds discarded and the ginger should be very finely sliced. These items should be added to a large casserole dish and the wine poured on top. The browned duck legs can then be sat on top, skin side facing uppermost, and the frying-pan with the duck fat in it should be set aside for later use. The dish should be covered and placed in to the oven for two and a half hours.

The sweet potatoes should be peeled, chopped and simmered in boiling water for fifteen to twnety minutes, until soft. They should then be drained well before being returned to the pot and shaken around a little to cause the edges to fluff up. The duck fat in the frying-pan should then be brought up to a high heat and the sweet potatoes stirred around in it for just a couple of minutes to crisp up.

The peas should be cooked according to the instructions on the packet and the meal plated up as shown above.

Thursday, 29 April 2010

A Grilled Turkey Sandwich and Fries - My Alternative to the KFC Chicken Double Down

Grilled Turkey Sandwich and Fries

I have to admit that all I know about the KFC Chicken Double Down is that which I have read in the online press. That is more than for any other reason that, to the best of my knowledge, the nearest KFC to where I am presently living is the one outside Glasgow Central Station and that would make it a very long journey just to sample some fast food! I must admit to having been surprised by the publicity generated simply by the launch of a fast food product but it at least gave me the idea for this grilled turkey sandwich, with homemade fries and garlic mushrooms. I decided to make it a turkey recipe as opposed to a chicken recipe, simply to make it a little bit different to most similar productions.

Ingredients (Per Person)

2 x 1/2lb turkey breast fillets
2 rashers of bacon
2oz low fat cheddar cheese (or other suitable hard cheese)
1 large potato
6 to 8 small button mushrooms
1 clove of garlic
Pinch of dried sage
1 tbsp extra virgin olive oil
A little sunflower oil

Method

The first step in this recipe is to attend to the fries. The potato should be peeled, then sliced and chopped in to the shape of fries. Very importantly, the fries should then be dried as much as possible in kitchen towel before being submerged in the frier for around four minutes, until they show only the first signs of beginning to colour. They should then be removed from the fryer, drained on some more fresh kitchen towel and allowed to cool before being placed in a Tupperware container and refrigerated for at least half an hour.

I cooked the turkey breast fillets here on an indoor, standard kitchen grill. They would probably at least look better cooked on an outdoor grill but that is not always practical in Scotland in April! They should be lightly rubbed with sunflower oil on both sides and grilled for around four to five minutes each side, depending on their thickness. The bacon should be added to be grill for around a minute each side towards the end of the cooking time.

When the bacon has been added to the grill, the cold fries should be re-added to the fryer for their last two to three minutes of cooking time. The olive oil should then be added to a small saucepan and brought up to a medium heat before the peeled garlic clove is grated in to it and the sage also added. The closed cup mushrooms should be quartered and also added put in to the pan. Note that the mushrooms should be cooked for no more than a couple of minutes, as the idea is more to heat them through and flavour them with the oil and garlic than cook them in to mush.

Assembling a Grilled Turkey Sandwich

When the turkey and bacon fillets and rashers are ready, they should be taken from the grill and the bacon rashers placed atop one of the turkey fillets. The cheese should then be grated and added on top of the bacon before the second turkey fillet is finally placed on as the top of the sandwich. The fries should then be well drained and added to the plate along with the garlic mushrooms for service.

Monday, 26 April 2010

Steak, Rocket and Red Onion Sandwich with Real Chips

Steak Rocket and Red Onion Sandwich with Real Chips

A steak sandwich is very often served on its own, either as a lunch dish, or perhaps even as an impromptu snack. Equally, however, a steak sandwich can make an excellent dinner when served in this fashion with real chips and does not take overly long to prepare. Also, when making a steak sandwich such as this, it is the cheapest cut of steak which should be used and nothing as elaborate as fillet or sirloin.

The recipe for making the chips which accompnay the steak can be found on several locations on this blog or simply by clicking here. I will therefore provide below instructions only for cooking the steak sandwich.

Ingredients (Serves Two, along with the Chips)

1/2lb slice of steak (often sold as sandwich steak)
12" French style stick loaf
1/2 red onion
Generous handful of fresh rocket leaves
2 tbsp horseradish sauce
A little sunflower oil for frying

Method

Although using a steak mallet would be akin to sacrilege on a piece of quality steak, tougher and cheaper cuts of steak which we are going to use for making sandwiches can well do with a bit of a beating prior to cooking. The fibres in the flesh are much tougher than in quality cuts of steak and even proper cooking and resting procedures can do with a little assistance in breaking them down. A reasonable amount of force (don't overdo it!) should therefore be used to pound the steak evenly across its entire surface.

A little sunflower oil should then be added to a non-stick frying pan and brought up to a very high heat. The steak of course can also be grilled or griddled, in which case it should be the steak which is lightly oiled. The steak should then be fried - depending upon its thickness - for around a couple of minutes each side.

While the steak is cooking, the bread stick should be halved in two horizontally and the horseradish sauce spread evenly over each half. The rocket leaves should then be added to the bottom half of the roll.

When the steak is cooked, it should be removed from the pan, set on a warmed plate and covered with foil to rest for a couple of minutes. The red onion should then be sliced and the pieces quickly fried in the juices of the steak.

The rested steak should be cut to size as required and the pieces placed atop the rocket leaves, with the hot onions added last of all. The top may then be added to the bread, pressed down firmly and sliced in half to be served with the hot chips.

Steak/Meat tenderiser Mallets on Amazon.com/Amazon.co.uk

If you don't have a meat tenderising mallet, below are a couple of deals - one each from Amazon.com and Amazon.co.uk - which you may find to be of interest.

Sunday, 11 April 2010

Polish Kielbasa with Caramelized Onions, Sauerkraut and Crispy Potato Pancakes

Today's post on, "What Should I Have for Dinner Tonight?" is the latest guest post. It is my pleasure to introduce a meal prepared for us by Mary Bishop - who writes very successfully for Helium.com under the pseudonym, Tierney O'Hara. Mary (Tierney) has not only prepared this meal for us but even gone to the bother of preparing settings and drinks accompaniment suggestions.

Without further ado, I will hand over to Mary - in whose own words this wonderful and delicious recipe appears...

Polish Kielbasa with Caramelized Onions, Sauerkraut and Crispy Potato Pancakes

It's late and I'm tired and hungry. I want something that is filling, that is easy to prepare and something that exists in my pantry or refrigerator right now. I throw on some sweat pants and a tee shirt because on this rainy day, I want comfort - in my clothes and in my food.

The pantry yields a large can of sauerkraut, a new bag of yellow onions and three pounds of russet potatoes. A quick look in the fridge says I have dry vermouth sitting on one shelf and a jar of Plochman's Kosciusko mustard on another. A six pack of Stella Artois sits cold and golden next to the mustard, and there are a couple of eggs still left in the carton. I open the freezer door to take a look see, and a loop of Polish sausage just about calls my name.

It was then I knew exactly what I should have for dinner tonight:

Polish Kielbasa with Caramelized Onions, Sauerkraut and Crispy Potato Pancakes

Preparation is simple, cost is minimal, calories? I didn’t count them, but I suggest you eat this meal on a day when you’ve skipped lunch.*

Ingredients

16 ounces Kielbasa
16 ounce can of sauerkraut
2 large onions
2 large eggs
5 medium potatoes
2/3 cup dry vermouth
Salt and pepper to taste

Method

Cut the Kielbasa into about 10-12 pieces on the diagonal. Place them into a non-stick skillet and heat on low. As the sausage cooks, the fat will seep out of the sausage and into the pan to add incredible flavor and color to the onions and the sauerkraut. After about five minutes, put the heat up to medium and add the two onions which have been cut into a large dice. Cover.

Next get your box grater and place it into a large bowl. Remove the skin from 5 potatoes and rinse and dry them. Grate the potatoes and when done, spill out the darkened water. Then add about 1/2 to 3/4 cups of flour, 2 eggs and salt and pepper. (Don’t add grated onions or garlic as they will soften the pancake and it won’t be crisp.)

Heat a second non-stick pan to medium. Lightly grease the pan with vegetable oil and using a large serving spoon, drop potato batter on to the hot surface. Cook until the edges are very brown, and then flip. Keep warm in a hot oven by placing them on a rack over a cookie sheet.

After about fifteen minutes, remove the lid from the sausage and onion pan and stir. Continue to stir to color the onions with the caramelized juices that have accumulated in the pan. Let the mixture cook until the juices have almost evaporated, then pour in the vermouth. Stir again, then push the sausage and onions to one side of your frying pan. Add in the can of drained sauerkraut and cover again. Let simmer on low until you are ready to serve.

On the next damp, rainy day when you are tired and hungry and you just don’t know what you should have for dinner –cook up this quick and simple peasant meal and I promise you that you will love it.

*Okay so it isn’t the healthiest meal but it’s not the worst either. Sauerkraut is low in calories and good for you as are onions and potatoes. The Kielbasa today is quite lean compared to years ago and my favorite Hillshire Farms brand has an unbeatable flavor. You can’t have a smoky sausage with hot mustard and a crispy, potato pancake without a beer, can you? I think there’s a law that says you can’t...

More Polish Cooking Recipes and Ideas

If you want more suggestions for delicious Polish meals, you may like to consider this excellent book, currently available on Amazon.com and Amazon.co.uk. Simply click on the relevant image for further details and/or to make a purchase.


Alternatively, you may wish to browse Amazon's book store or shop for yourself, to see if you can pick up any further deals. In order to do so, simply click on the relevant link below:

Amazon.com Bookstore

Amazon.co.uk Book Shop

Friday, 2 April 2010

Fillet of Pork Tenderloin with Sweet and Spicy Chilli Sauce

Pork Fillet Tenderloin with Sweet and Spicy Chilli Sauce

Fillet of pork tenderloin is unquestionably my favourite cut of pork and one of my all-time favourite cuts of meat. Although it is possible to cook a fillet of pork tenderloin in the oven, I actually prefer to pan-fry it. This allows me to watch it cook and monitor its progress, so that I know for a fact that it is cooked to perfection.

Pork Fillet TenderloinThe first step to preparing this recipe is to prepare the Sweet and Spicy Chilli Sauce. The way in which I like to do this is to prepare it in bulk and freeze it in manageable proportions which can be later defrosted as required. It is very quickly and simply made with a base of one large can of tomatoes and additions of onion, garlic, red chillies, courgette (zucchini,) sugar and seasoning. The link below is to the full sauce recipe in text and pictures.

Sweet and Spicy Chilli Sauce

I have served the sauce warm as opposed to hot (in a temperature sense) with this meal, so preparing the sauce in the first instance, covering it and setting it aside while the other ingredients are prepared should be just about right.

Firstly, the pork tenderloin should be put on to cook. I simply brought a little sunflower oil up to a medium hot temperature in a non-stick frying pan before frying the tenderloin for eight to ten minutes each side. This will vary dependant upon the thickness of the tenderloin but it should be remembered that pork must never be served under-cooked.

The Brussels sprouts should be prepared for cooking while the pork tenderloin is frying on its first side. When the pork tenderloin has been turned, they should be added to some boiling, salted water and simmered for eight to ten minutes, depending upon their size.

When the sprouts are ready, they should be carefully drained through a colander and - if desired - may be lightly buttered before being plated up with the pork tenderloin and the sauce as shown above.

A Note about Brussels Sprouts

Although Brussels sprouts are one of my favourite vegetables, I am aware that they are in general one of the least popular. If you perhaps have trouble getting your family to eat Brussels sprouts - or even are not so keen on them yourself - you may find the book featured below on both Amazon.com and Amazon.co.uk to be of interest. It examines not only how nutritious Brussels sprouts are but a great many delicious ways in which to cook them in order to enjoy them at their very best.

Click on the relevant panel below for lots more information or to buy this fabulous book.

Friday, 26 March 2010

Seared Sea Scallops on BLT Salad with Oven Roasted Potato Slices

Seared Sea Scallops on BLT Salad with Oven Roasted Potato Slices

Scallops are one of my all-time favourite foodstuffs. Their incredibly sweet, delicate flavour and texture is an eating experience in itself, which means it is vitally important that one be extremely careful not to overcook scallops, or to serve them with anything which will overpower their flavour. I have eaten scallops raw - straight from the shell - only minutes after they were hand-plucked from the seabed, I have eaten scallops poached and I have eaten scallops seared in a pan, as in this recipe. Regrettably, I have also had another eating experience with scallops which illustrates perfectly why it is so necessary to be careful when cooking or serving scallops...

It was while living in Edinburgh a few years ago that I visited a top, "European," style restaurant - I will not name the country for fear of causing offence! - to mark a special occasion. (Though believe it or not, I can't remember specifically what the special occasion was!) I knew that it was going to be an expensive night but, well - everyone needs a treat now and again.

As soon as I saw scallops on the menu, I knew what I was having - there was no further decision to be made. I duly ordered them and - given the restaurant's reputation - awaited them as a child would Santa Claus on Christmas morning. I can still remember my horror when the plate was laid before me - I even did a mental check to make sure it wasn't April 1st! The scallops had been completely covered in what was no doubt an elaborately prepared sauce - but to me, given what it was covering, appeared as no more than a destructive yellow slime, equating to an oil-slick on the ocean. I looked up at the young waiter and he looked aghast because he no doubt saw my reaction. I was so shocked, though, I couldn't speak and forced myself to eat the preparation. Needless to say, I tasted nothing of the scallops as their flavour had been completely over-whelmed.

That meal for two (OK - including the wine) cost me mere pennies less than £250.00 (almost US$400.00) and needless to say I never ventured near the establishment again, nor would I ever recommend anyone else do so. Although I had long since known the way scallops could be overwhelmed in such a fashion, that was my first - and hopefully last - experience of it!

Islay May 2008 091The scallops which I cook with come from the cold Atlantic waters off the West Coast of Scotland (pictured are the beautiful but treacherous waters of the Sound of Islay.) The fresher they can be obtained, clearly the better and although I generally leave the coral attached (looks almost like an orange tail) the ones used in this recipe had already had the coral removed prior to me obtaining them.

This recipe is for one person.

Ingredients

6 or 7 baby sea scallops
1 medium potato
2 rashers of unsmoked bacon
6 cherry tomatoes
2 lettuce leaves
Salt and freshly ground black pepper
A little sunflower oil for cooking the potatoes

Method

It is first of all necessary to get the potato slices on to cook. The oven should be put on to preheat to 400F/200C/Gas Mark 6. A baking tray with circa a tbsp of sunflower oil on it should be placed in the oven to heat simultaneously. Note that putting the potato slices on to a cold baking sheet with cold oil will simply cause them to stick to it, absorb the oil and be ruined. The potato should be washed, dried (but not peeled) and sliced in to 1/4" thick discs. When the oven is heated, they should be seasoned with salt and cooked on the baking tray for half an hour, turned after 15 minutes.

When the potato slices are in the oven, the two bacon rashers should be placed in to a dry, non-stick frying pan and heated gently at first (to release some of the fat) until fairly crisp. It is the fat of the bacon in which the scallops will later be cooked. When done, the bacon rashers should be patted dry, thinly sliced and added to a mixing bowl. The tomatoes and lettuce leaves should then be washed and dried before the tomatoes are halved and the lettuce shredded. The tomatoes and lettuce should then be added to the bowl with the bacon and seasoning added in the form of freshly ground black pepper only - the bacon should provide all the salt required. The ingredients should be stirred and covered until required.

Seconds before the potato slices are to be removed from the oven, the pan with the bacon fat should be put back on to the heat, at maximum. The potatoes should then be removed from the oven and placed on a plate covered with kitchen towel to be dried. A second sheet of kitchen towel should be placed on top.

When the frying-pan is virtually smoking hot, the scallops should be added and cooked for thirty seconds each side - no more. They should then be removed from the pan and the meal plated up as shown in the top photograph of this post.

Wednesday, 24 March 2010

How to Make Beer Can Chicken - by The Thrillbilly Gourmet

Today, I am taking a complete break away from the norm on, "What Should I Have for Dinner Tonight?" I am essentially taking a back seat and featuring a guest blogger on the site. This is something which I will do from now on, on a fairly regularly basis, and I will endeavour to provide as much variety in cooking style and recipe ideas as I can.

I would like to introduce you today to The Thrillbilly Gourmet from Tennessee, USA. Like me, The Thrillbilly Gourmet has no formal culinary training but has learned her craft both through experience and through knowledge acquired from others in a whole host of different ways, over a period of time.

The Thrillbilly Gourmet will show us in this post how to make beer can chicken, in a simple, no-nonsense fashion. Even better, she will do so in the form of videos, taking us through the process from start to finish.

I would seek only to point out at this stage that UK readers/viewers should use lager for this recipe for best effect, rather than ale/bitter/stout. Save the latter options for cooking with stronger flavoured meats such as beef, in the form perhaps of Steak and Ale Pie. I would also heartily recommend that where circumstances and budgetary considerations permit, free range, organic chicken should be used in this or any chicken recipe.

In this first of two videos, The Thrillbilly Gourmet will take us through the process of preparing the chicken for the grill and actually getting it on the grill. Sitting comfortably? Click the arrow in the centre of the screen below to start the video...


It goes without saying, of course, that in order to prepare this truly delicious dish, one requires a suitable grill. It may well be the case that you already have one and, if so, great! If you don't have a grill or barbecue suited to making this recipe, however, or perhaps you simply feel that yours is past its best and requires replacement, here are a couple of options you may wish to consider on both Amazon.com and Amazon.co.uk. Simply click on the relevant image for further details.

(Note that I have included one gas and one charcoal grill in each instance.)


You may be thinking that now the chicken is on the grill, all you have to do is wait until it is cooked, remove it, cut it and eat it. As we shall see in the second video, however, that is not the case. Don't make the mistake of failing to watch the second video in full if you truly want to enjoy beer can chicken at its very best!

Once again, The Thrillbilly Gourmet takes us through the required process...


Well, I hope that you are hungry and off to arrange to try this recipe out for yourself. Thank you for watching the videos today and I hope that you enjoyed the deviation from the norm. If you want to see lots more videos from The Thrillbilly Gourmet and discover more of her mouth-watering recipes, you can do both via the link below:

The Thrillbilly Gourmet (aka Dixie Mockingbird) on Hub Pages

Sunday, 21 March 2010

Homemade Beefburger on Mashed Potato Pate Bun

Hundred Percent Beefburger on Potato Pate Bun

Burgers can on occasion - especially when they are of the fast food variety - be an extremely unhealthy food option. I have for a long time been on the look-out for ways on which to improve upon this factor and make the much-loved burger a healthier meal consideration. It was the sheer coincidence of having some leftover mashed potato to use up that gave me this idea yesterday and I have to say that I was delighted by the way in which it turned out.

This was also an experiment in that when I make burgers, I usually add something to the meat and very much use different types of meat. It may be egg, breadcrumbs, fresh herbs, onion, or a mixture of two of these ingredients or more. On this occasion, however, I decided to make the burger purely from beef, other than of course some seasoning in the form of salt and freshly ground black pepper.

This recipe is in the quantites required for one serving.

Ingredients

1/4lb minced/ground beef
2 tbsp cold mashed potato (incorporating salt and butter)
2 tsp plain (all-purpose) flour
4 lettuce leaves
1 tomato
Salt and freshly ground black pepper
Sunflower oil for frying

Method

The mashed potato can of course be of the leftover variety or it can be prepared specifically for the purpose of making this meal. If it is to be made specifically, it should be seasoned with salt and mashed with a little butter, before being covered and left to cool. At that point, the flour should be mixed through it.

The burger pate should be prepared simply by seasoning the beef with salt and pepper and rolling it in to a round ball with lightly floured hands. It can then be flattened in to a burger shape between the palms and fried over a medium heat in a non-stick frying pan with a little sunflower oil in it for around ten minutes each side.

When the burger is cooked, it should be transferred to a hot plate and covered with foil to rest and keep warm. The heat in the pan should then be turned up to high.

The floured potatoes should be rolled in to two balls, slightly bigger than golf balls, again with floured hands. They should then carefully be flattened to circles about three to four inches in diameter and added to the hot pan. I fried them for three minutes on one side and two on the other. This had the effect of making one side golden and the other only slightly coloured, just as the two sides of a conventional burger bun would be.

One half of the burger, "Bun" should then be put on to the plate, coloured side down and the burger sat on top. The second half of the, "Bun," should then be added, coloured side uppermost. I was amused to find at this point that gravity caused the edges of the top potato pate to curl over and even better create the image of a burger in a traditional bun.

The lettuce leaves should be shredded, the tomato quartered and the salad arranged around the burger, prior to serving, as shown above.

NB I would recommend that you eat this burger with a knife and fork - attempting to pick it up in your hands may prove rather messy!

Do you want Further Help in Making Fast Food Healthy?


Whenever we contemplate healthier eating, very often we will recognise what we believe to be the inevitability of giving up fast food. The good news is that this is absolutely not the case. What have to do - as in the recipe above - is come up with new and innovative ways of preparing the traditional fast foods at home, in a healthier fashion.

In this fabulous book, Devin Alexander looks at more than seventy-five fast food recipes which can be prepared in a far healthier fashion than they would be served in a fast food restaurant and shows you how to prepare them at home. The book is even discounted at the moment - but then again, what price your family's health?

Thursday, 18 March 2010

Aberdeen Angus Fillet Steak with Garlic and Leek Pastry Bombs

Garlic and Leek Pastry Bombs Ready to be Cooked"What are garlic and leek pastry bombs?" is likely to be the first question asked by a great many who come across this blog post. The simple truth of the matter is that garlic and leek pastry bombs (pictured right, ready to be cooked) are a meal accompaniment which I, "Created," entirely by accident, from ingredients which I had available, when an inopportune telephone call caused me to burn the filling which was supposed to go in to the pastry. That is the bottom line but does not change the fact that they are absolutely delicious and it is guaranteed that I will be making them again.

The following recipe is for two people.

Ingredients

2 Aberdeen Angus fillet steaks
2 small carrots (scraped and chopped in to discs)
1 small leek (with at least 6" of green leaf)
4oz puff pastry (chilled)
1 clove of garlic
Pinch of dried sage
Salt and freshly ground black pepper
A little milk
A little butter
Sunflower oil for frying the steaks

Method

I have prepared the instructions for making the garlic and leek pastry bombs in great detail, with a number of photographs included to assist you in the process. To avoid repetition and to save time and space, these instructions can be found by clicking here. They will open in a new window.

Fifteen minutes prior to the garlic and leek pastry bombs being ready, the carrots should be added to some salted, boiling water and simmered gently until the pastries are ready. It is thereafter important to remember, that as well as the required cooking time, the steaks will have to be rested for a few minutes prior to serving. These 1/2" thick steaks, I cooked in a very hot pan, containing a little sunflower oil, for about a minute each side, before removing the pan from the heat and allowing them to rest as they were for three or four minutes. I have stated many times that I enjoy a steak best when I can feel the blood dribbling down my chin but I am aware that is not everyone's preference and the cooking time may be adjusted as required.

When all the components of the meal are ready, the carrots should be drained through a colander and the meals plated up for service as shown below.

Aberdeen Angus Fillet Steak with Garlic and Leek Pastry Bombs

Friday, 12 March 2010

Scottish Game Pie with Roasted Potatoes and Brussels Sprouts

View from Glen Branter Forestry PathThe beautiful, sparsely populated areas of Scotland means that Scotland has a very wide range of wild game to choose from. Everywhere from Glen Branter (pictured right) in beautiful Argyll, to the stunning heart of Scotland in Perthshire, to the rugged majesty of the Highlands and more, wild game from pheasant and grouse to the magical red deer can be found aplenty. Most Scottish Game Pie Recipes will include a mixture of the different types of game. My recipe featured and pictured below, however, includes only my own personal favourite: venison.

It is worth pointing out, perhaps, that venison is a word which can actually cause a little bit of confusion on a planetary scale. The word venison is - by literal definition - a generic term, used to apply to the meat of many related mammals such as deer, elk and caribou. (I almost included moose as an example in the previous sentence, before I realised that could really confuse matters as, to many Scots, a "Moose," is a mouse - most definitely not a form of venison!) In Scotland and indeed throughout the UK, however, venison and deer meat will almost always be considered to be synonymous.

This recipe for two people is in no way difficult to prepare but the length of time required to do so is due to the long, slow cooking time required by the venison.

Ingredients

3/4lb diced venison haunch
1/2 medium sized onion (roughly chopped)
6 button mushrooms (halved down through centre)
5oz puff pastry
1/2 tsp dried thyme
2 pints fresh beef stock (No, I never get tired of saying it: none of those disgusting little chemical cubes!)
3 large potatoes
14 to 16 Brussels Sprouts
Pinch of nutmeg
Butter
Salt and pepper
A little milk for glazing the pie
Sunflower oil for deep frying

Method

The first step is to cook the venison. Wash any excess blood off it and dry the meat with kitchen towel. Put it in to a large pot along with the onion and brown it over a high heat, stirring continously with a wooden spoon. Add the beef stock (pre-heated) and the thyme and simmer for two to two and a half hours until the venison is tender. The liquid may very well require to be topped up at some point during this period and simple boiling water may be used. The mushrooms should be added at the end of the simmering period, stirred through, the pot covered and the meat allowed to cool.

The oven should be put on to pre-heat to 200C or equivalent. The venison, vegetables and stock should then be transferred to an appropriate pie dish. The pastry should be rolled out to a thickness of between an eighth and a quarter of an inch and placed carefully on top, taking care to seal the edges. The pie should then be glazed with a little milk and a couple of slits made in the top to allow steam to escape during cooking. The pie should be placed in to the hot oven for thrity-five, to forty minutes, until beautifully golden brown.

The potatoes should be peeled, chopped and boiled in salted water for fifteen minutes. After which time, they should be thoroughly drained and added to hot oil for a further ten minutes, until crisp and golden.

The Brussels sprouts should be cleaned and simmered in boiling water for no more than eight to ten minutes, depending on the size of the sprouts. Any longer will see them over-cooked and soggy. One of the main reasons why children don't like Brussels sprouts is that they are forced to eat them in this distasteful fashion. When the Brussels sprouts are thus cooked, they should be drained before being returned to the pot and swirled in a little butter and a pinch of ground nutmeg.

This delicious Scottish Game Pie with roasted potatoes and Brussels sprouts may thereafter be plated up and served, as shown below.

Scottish Game Pie with Roasted Potatoes and Brussels Sprouts

Would you like to find out more about Wild Game and Wild Game Recipes?

There are presently two excellent books available on both Amazon.com and Amazon.co.uk featuring lots of great information on everything from how to clean wild game, to how to cook it, to some great recipe suggestions. For your convenience, I have linked to both of them with handy Amazon.com and Amazon.co.uk panels below.

Wednesday, 10 March 2010

Pan Fried Fillet of Scottish Rainbow Trout on Fresh Salad Bed with Dill Potatoes

Pan Fried Fillet of Scottish Trout with Salad and Dill PotatoesAlthough I love cooking and love eating what I cook, it is rare for me to enjoy something so much that I actually contemplate having the very same thing again the following night! I am writing this blog post less than half an hour after eating this pan fried Scottish rainbow trout with salad and dill potatoes but that is exactly what I am considering.

It may seem like a strange thing for a Scot who loves fish and seafood to say but salmon and particularly trout could never be classed among my favourite types of fish. I have for some reason always preferred the sea fish that are the likes of cod, haddock, whiting, herring and mackerel. When I used to go fishing on a regular basis, it was almost always sea fishing which I did, almost never freshwater fishing in Scotland's inland lochs or rivers. I am not sure whether going sea fishing was because I preferred to eat sea fish, or preferring to eat sea fish is because I preferred sea fishing. That conundrum is a bit like the chicken and the egg for me!

Regardless, perhaps I have now changed my mind about trout. Although I have cooked salmon in precisely this fashion many times, I have for some reason never before tried it with trout. I hope that my enthusiasm is infectious, however, and that you will try this out for yourself.

Ingredients

1 Scottish rainbow trout fillet, skin on (wild brownies are equally acceptable)
2 medium potatoes
1/2 small onion (very thinly sliced)
4 lettuce leaves (shredded)
1 tomato (for garnish)
Pinch of dried dill
Tbsp of plain flour
Butter
Sunflower oil
Salt and freshly ground black pepper
Splash of white wine vinegar

Method

The first step is to get the potatoes on to boil. They should be peeled, chopped and added to a pan of boiling, salted water, to be simmered for twenty to twenty-five minutes until moderately soft. They should then be drained, added to a bowl with a little butter and the pinch of dill, stirred carefully and left to cool slightly and the flavours to infuse while the trout fillet is cooked.

The flour should be placed on a flat dinner plate and seasoned with salt and pepper. The skin side only of the trout fillet should then be placed flat down in the flour to be lightly coated. Any excess may be gently shaken off prior to adding the trout fillet to the pan.

A little sunflower oil should be added to a non-stick frying-pan and brought up to a medium heat. A little butter should then be added before the trout is placed in the pan, skin side down. The heat should be turned up to medium to high and the fillet cooked for three to four minutes until it can be seen to have cooked almost all the way through. The heat should then be turned off completely and the fish turned over to finish cooking while the salad is quickly assembled.

The sliced onion and shredded lettuce should be added to a small bowl and seasoned with salt, pepper and a tiny splash of vinegar before being mixed well together. Preparing the salad too soon in advance will cause the lettuce to go limp and spoil the final effect. The salad should then be arranged on the plate as a bed for the fish before the remainder of the ingredients are then assembled, the trout being plated skin side up.

At the top of this post, I have included a photograph of this recipe with the skin still on the trout. It is down to personal preference whether you wish to serve it this way or to remove the skin prior to doing so. In order to remove the skin, simply catch one end of it and gently peel it free. The assistance of a knife may be required at this stage but I found tonight that it was not and the skin peeled away perfectly cleanly and easily.

The dish is featured again below with the skin this time removed.

Fillet of Scottish Rainbow Trout with Salad and Dill Potatoes