Tuesday, 23 August 2011

Beef and Tomato One Pot Stew


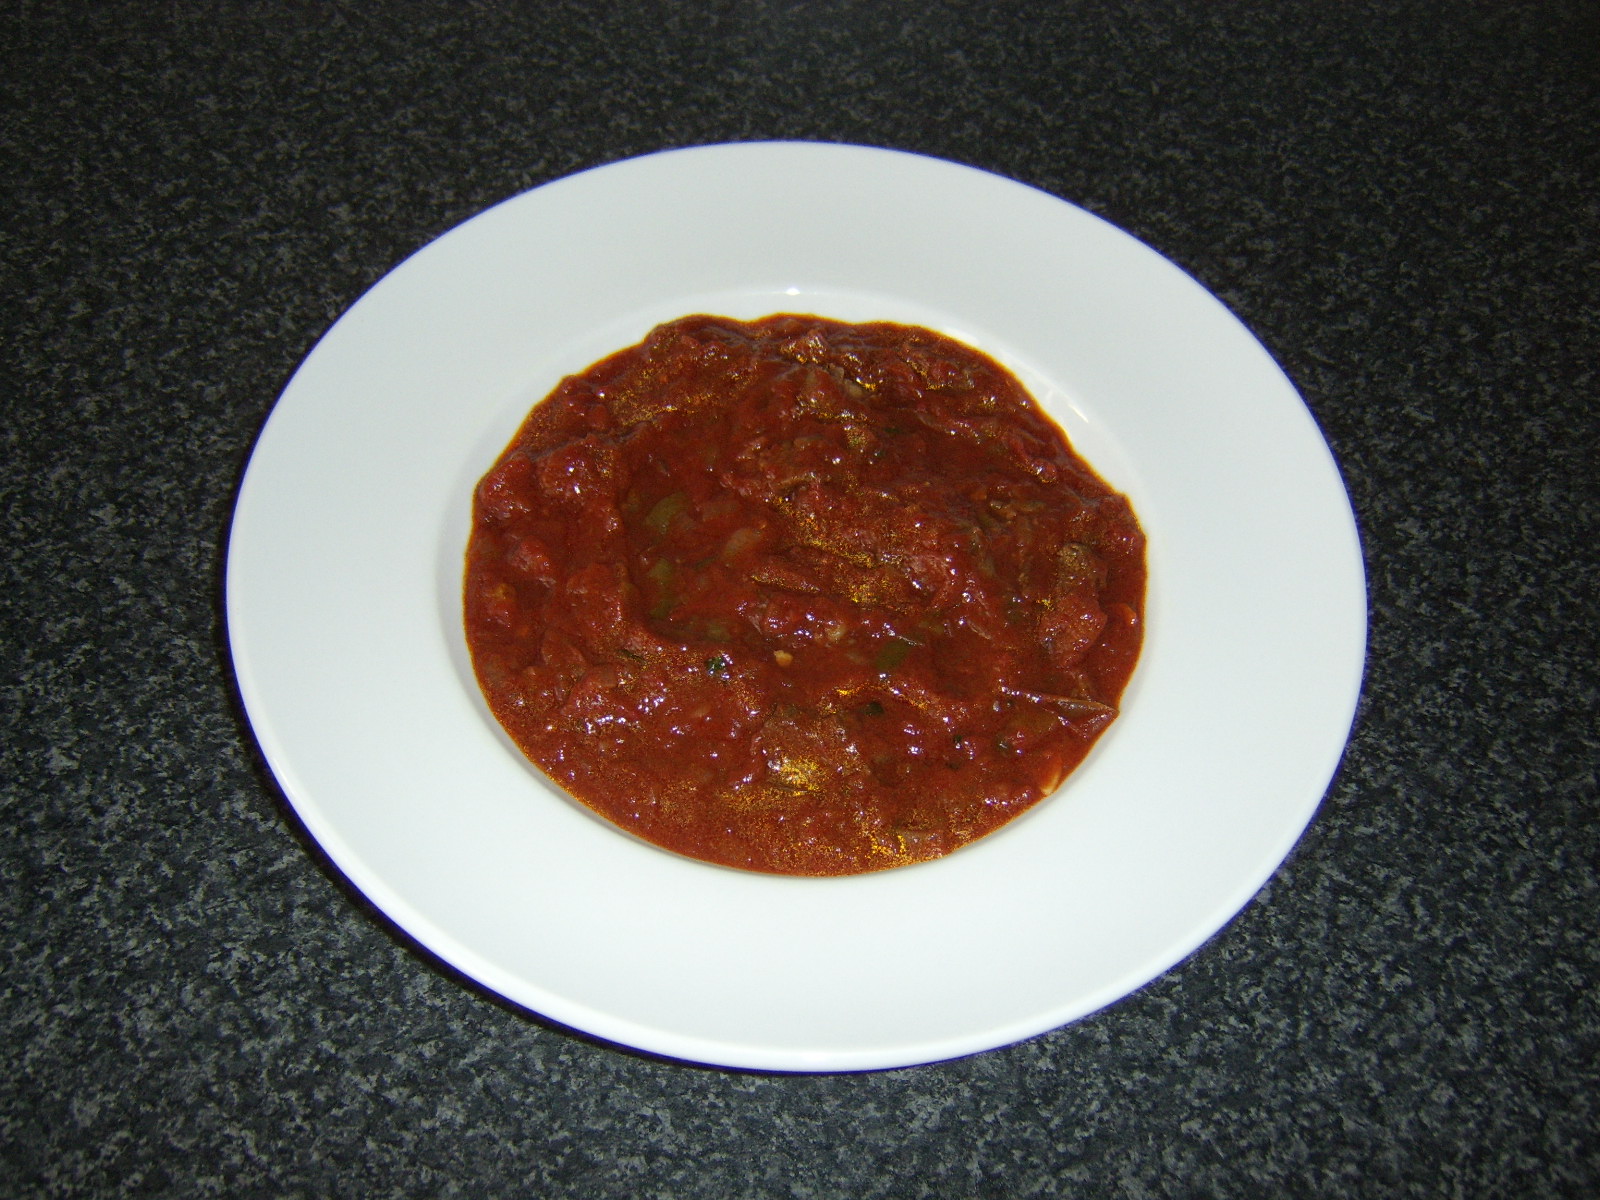
This beef and tomato stew is incredibly easy to make and is delicious perhaps particularly on a cold Winter's night but very much at any time of year. The only possible drawback with this one pot stew is that it does require a good couple of hours' cooking time. The good news, however, is that making it one night, cooling it, refrigerating it and reheating it (thoroughly) for dinner the next night gives the flavours additional time to infuse and makes it even more tasty. Try serving it with some warmed chunks of fresh, crusty bread.

The beef I have used in this recipe is shin of beef. That is not simply because shin of beef is one of the most inexpensive cuts of beef you can buy but very much because, when the time is taken to cook it properly, it is also one of the tastiest.


Ingredients for Two People

3/4lb shin of beef
1 14oz can of chopped tomatoes in tomato juice
1 pint of fresh beef stock
1/2 medium white onion
1 green bell pepper
2 cloves of garlic
2 tbsp olive oil
1 tsp freshly chopped basil leaves (plus two small sprigs for garnish)
Salt and freshly ground black pepper


Chop the shin of beef in to three-quarters to one inch chunks. Any excess fat can be discarded but do not trim off all the fat. It is the fat which will keep the beef moist and tender during cooking and which also contains a lot of the flavour. Heat the olive oil gently in a large stew pot and add the beef to brown, stirring it frequently with a wooden spoon for three or four minutes until completely and evenly sealed.


Finely slice the half onion and the garlic. Cut the green bell pepper in half and remove and discard the seeds and white inner membrane. Slice to a quarter inch thickness. Do note, however, that only half the pepper is incorporated in the stew and the remainder is reserved to garnish and add a little bit of crunch to the presented dish.


Add the onion, bell pepper and garlic to the beef. Stir well and cook for two to three minutes, while you heat the beef stock in a separate pot. Add the canned tomatoes to the mix, followed by the seasoning (salt and pepper) and beef stock and bring to a simmer.


It will take at least two hours, perhaps two and a half, for the shin of beef to become properly tender. Stir the stew occasionally during this time and watch that it is not becoming too thick and devoid of moisture. If necessary, add a little bit of boiling water as required, to ensure there is always some liquid present and that it does not burn.

When the beef is tender, add the chopped basil, stir through and cook for a further five minutes. Taste for seasoning and serve immediately, garnished with the remaining strips of bell pepper and sprigs of basil. Alternatively, cool and refrigerate for a quick and easy dinner the following evening.


Friday, 19 August 2011

Pork Tenderloin Fillet with Blueberry and Apple Cider Sauce


The tenderloin is not only the most tender part of a pig, it is also probably the tastiest. Although not the cheapest cut of meat, pork tenderloin generally remains considerably less expensive than even a moderately decent beef steak. It is important when we are cooking tenderloin, because it is so lean, that we take care that it doesn't dry out and become tough and/or unpalatable. Equally for this reason, it is nice to serve a rich, fruity sauce with the cooked tenderloin fillet.

In a majority of cases, people thinking of a fruit sauce to serve with pork will automatically think of apple sauce. While apple sauce is indeed an excellent accompaniment to many different cuts of pork, it is refreshing on occasion to find and try an alternative. The sauce in this instance was originally intended to be a straightforward blueberry sauce and the meal accompanied by the bottle of cider. The decision to actually incorporate a little of the cider in the sauce was very much a last minute one but definitely something I believe worked well.

Ingredients per Serving

3/4lb fillet of pork tenderloin (it will shrink significantly during cooking)
5 or 6 small new potatoes
2oz trimmed green beans
1 tbsp fresh blueberries
2 tbsp apple cider
1/2 tsp sugar
1oz butter (plus a little extra for potatoes)
Little olive oil for greasing foil
Salt and freshly ground black pepper


Method

Preheat your oven to 375F/190C. Lay a large sheet of aluminium foil on a baking tray and very lightly grease the centre - where the pork tenderloin fillet will sit - with a drizzle of olive oil. Place the pork on the oiled area, season with salt and pepper and wrap the foil into a loose but sealed tent. Cook in the oven for twenty-five minutes. It should then be removed from the oven and set aside (still wrapped in the foil) to rest for ten minutes while your potatoes finish cooking and you cook your sauce and beans.

Wash but don't peel your new potatoes. Add them to a pot of cold, slightly salted water and put on a high heat until the water boils. Reduce to a simmer for twenty to twenty-five minutes until the potatoes are soft when tested with a metal skewer or the point of a sharp knife.


Wash the blueberries and add them to a small saucepan, along with the sugar and cider. Place the pan on a medium heat and cook until the blueberries burst and the sauce starts to thicken, stirring occasionally with a wooden spoon. This should take around four to five minutes. Reserve the remainder of the bottle of cider to enjoy with your plated meal.


The green beans could of course be blanched in water if you prefer but in this instance I have quickly fried them off in some butter. Put the 1oz of butter in to a small, non-stick frying pan and gently melt. Add the beans and season with salt and plenty of black pepper. Cook on a fairly high heat for two to three minutes, moving them around frequently with a spatula.


Drain your potatoes and return them to the empty pot with the remaining butter. Swirl them gently around to ensure even coating. Carefully unwrap the pork and lay it on a heated serving plate. The potatoes and beans should be arranged alongside before the blueberry and apple cider sauce is carefully spooned over the pork. Serve immediately - not forgetting the remainder of your cider!

Wednesday, 17 August 2011

Grilled Coley Fillet with Herb Baked New Potatoes and Mushrooms


Coley is one of the sustainable types of fish which is perfect for eating instead of the desperately endangered Atlantic cod or haddock. It is a white, meaty fish, just like cod or haddock, and where it is cooked properly, coley can be every bit as tasty and enjoyable as its distant cousins. Coley is known by a number of different names just in the UK alone, such as coalfish, saithe or cuddies. In the US, coley is commonly linked with pollack and the two are known collectively as pollock.

This grilled coley is one of the quickest and easiest ways of cooking fillets. It is a domestic, overhead grill that is used (broiler), rather than an outdoor grill. 


Ingredients per Serving

1 fresh coley fillet (skin on - very important)
1/2 oz butter
3 medium sized new potatoes
2 closed cup mushrooms
1/2 medium onion
Large clove of garlic
Generous pinch of dried thyme
Generous pinch of dried rosemary
1 tbsp olive oil
Salt and white pepper


Put your oven on to preheat to 400F/200C. Wash the potatoes and add them to a pot of cold water. Put the pot on to a high heat and bring the water to a boil. Reduce the heat and simmer for five minutes. Take the pot to the sink and run cold water in to it for a minute or so to rapidly cool the potatoes. Peeling the potatoes is optional. Normally I wouldn't but in this instance, the skins were particularly blemished so I simply rubbed them off with the ball of my thumb. Chop the potatoes in to approximately 1" chunks.


Pour the olive oil in to a glass or stone mixing bowl. Add the herbs and season with salt and white pepper. Mix well. Mixing the seasoning with the oil before adding the remaining ingredients allows the seasoning to be distributed much more evenly and effectively.

Roughly chop the onion half, cut the mushrooms in half and peel and finely slice the garlic. Add the onion, potatoes, mushrooms and garlic to the bowl. Instead of stirring the ingredients, hold the bowl at a slight angle with one hand and fold the vegetables through the oil with a wooden spoon, similar to how you would fold flour in to wet ingredients. This method will be less likely to damage the potatoes or mushrooms.

Lay a large sheet of aluminium foil on a baking tray, shiny side uppermost. Carefully pour the vegetable mix in to the centre and wrap in to a loose but sealed tent. Bake in the oven for forty-five minutes.


If, like me, you have a combination oven and grill, it is clearly not practical to use both at the same time. In this instance, this is not a problem. When the potatoes are ready, turn off the oven and remove the tray to a heatproof board. Being very careful of escaping steam, unwrap the foil enough to test the potatoes are done with a skewer or the point of a sharp knife. Rewrap and leave like this while you grill the coley fillet. The vegetables will easily remain hot during this time.


Take about a third of your half ounce of butter and use it to lightly grease a non-stick grilling tray. Lay the coley fillet on the greased area, skin side down. Season the coley with salt and white pepper. Break the remainder of the butter in to small pieces and distribute evenly over the top of the fish. Grill under a moderately hot grill for six or seven minutes until the coley just starts to separate in to flakes and you can clearly see it is cooked.

Use a fish turner to carefully transfer the coley fillet to your serving plate. Add the potato mixture alongside and if you do wish to add further garnish, try some sliced cherry tomatoes, or freshly chopped parsley.


Tuesday, 16 August 2011

All Day Breakfast With A Difference


The all day breakfast is a very popular concept, here in the UK at least. After all, a lot of people who love the combination of ingredients can't face a large fried breakfast in the morning before they go to work - or alternatively, they simply don't have time to make it. One of the dangers of visiting a cafe, however, for an all day breakfast, is that by doing so in the afternoon or early evening, you run the risk of simply getting that morning's unsold reheats. It will by no means always be the case but I vividly recall one experience in Central London, near Kings Cross Station, going for an all day breakfast that would have put anyone experiencing it for the first time off the idea altogether for life!

This all day breakfast is different in the sense that it uses a variety of cooking methods, as opposed to simply the one or two frying pans options. The ingredients - most importantly - are all freshly cooked. If you are someone who has a heartier appetite in the evening than in the morning, you can enjoy an almost traditional fried breakfast to full effect at the best time of your choosing.

Note: Although you may not have access to Lorne sausage, or even black/blood pudding, you can mix and match, with perhaps the likes of small burger patties. It must also be remembered that bacon is very different here in the UK to what it is in the USA. British bacon is taken from the back of the pig, while US bacon is taken more from the belly. This Ayrshire middle bacon is almost a combination of the two but bacon rashers of any type will suffice.


Ingredients per Person

2 beef link sausages
1 Lorne sausage
1 slice of black pudding (be sure to remove plastic rind if still attached!)
2 slices of Ayrshire middle bacon
1 large breakfast mushroom (4 to 5" diameter)
1 medium tomato
1 egg
Vegetable oil for frying


You will need ideally two frying pans for this meal, even though the bacon is going to be grilled and the egg hard boiled. Pour a little bit of oil in to the larger pan and add the two link sausages. Do not prick the sausages. This only causes the juices and the flavours to be lost in to the pan. They are going to be cooked very slowly, which should prevent them from bursting. Put the pan on to a very low heat and fry for ten minutes, turning occasionally with cooking tongs.

After ten minutes, leave the sausages where they are (they require twenty minutes' cooking time) and add the black pudding and Lorne sausage to the pan. These two items should be fried for five minutes each side.

At this point, add your egg (which should be at room temperature and not straight from the refrigerator) to a pan of cold water. Put on a high heat until the water starts to boil. Reduce the heat and simmer for six or seven minutes. Add a little vegetable oil to the smaller frying pan and bring up to a fairly high high heat. Carefully pull the stalk out of the mushroom and half the tomato. Put the tomato halves flesh side down in to the frying pan and the mushroom in, cup side up.


The sausages and black pudding should be removed from the large frying pan to a heated plate and covered with foil to keep warm while the remainder of the meal is completed. You will likely find that water has accumulated in the cup of the mushroom. Use your cooking tongs to lift the mushroom and pour the water in to a small cup or bowl to be discarded. Fry the mushroom cup side down for the last few minutes while you grill the bacon under an overhead grill for a couple of minutes each side.


Take the pot containing the egg to the sink and run cold water in to it for about thirty seconds or until the egg is cool enough to handle. Crack the shell of the egg all around on a hard surface and peel under running cold water. Carefully quarter the egg lengthwise on a wooden chopping board with a sharp knife.

Plate the mushroom cup side uppermost. Arrange the sausages, black pudding and tomato halves around it. Shake the excess grease off the bacon before laying it as a bed for the egg quarters inside the cup of the mushroom. Arrange the egg as shown at the top of this post and serve immediately, with HP Sauce or Tomato ketchup, as desired.


Monday, 8 August 2011

Sausage and Tomato Naan Bread Pizza


Naan bread pizza may just change the way you think of pizza for ever. Not only is it absolutely delicious, naan bread pizza is a fantastic way of using up leftover food items, including everything from the naan bread itself, to perhaps roast chicken, to - as in this instance - sausages. The items which can be incorporated in naan bread pizzas are virtually limitless and given that I presented a vegetarian naan bread pizza on this blog a few weeks back, I am now evening up the score with this sausage and tomato option.

It is possible of course to use tomato sauce from a jar for this recipe. If making your own, however, as I have done, note that it is vital you leave it to cool before spreading it on the naan bread. Otherwise, it will simply soak in to the naan, making it soggy and spoiling the whole effect of your pizza. Remember, therefore, to factor in around an extra hour to your cooking time for this purpose. Alternatively, make the tomato sauce the night before and refrigerate it.

Ingredients per Naan Bread Pizza

1 10" long naan bread

1 8oz can chopped tomatoes in tomato juice
1 clove of garlic
1/2 tsp dried basil
Salt and black pepper

2 sausages (precooked)
1 medium tomato
1/2 small red onion
2oz pizza mozzarella cheese
2oz cheddar or similar hard cheese
3 or 4 basil leaves for garnish


Method

Pour the tomatoes in to a small saucepan. Peel the garlic clove and grate it in to the tomatoes with a small hand grater. Season with the dried basil, salt and black pepper. Place on a high heat until the tomatoes reach a simmer. Reduce the heat and simmer for fifteen to twenty minutes, stirring frequently with a wooden spoon, until a lush sauce is formed. Remove from the heat, cover and set aside to cool.


The naan bread pizza will need to go in to a hot oven so put your oven on to preheat to 450F/220C before you start building the pizza.

Lay the naan bread on a large baking tray and pour the tomato sauce in the centre. Spread the sauce evenly over the naan bread with the underside of a large spoon.


These sausages which I had leftover were organic pork, Cornish cheddar cheese and tomato. Any type of sausage will do, however, provided they are precooked and ideally cooled. Slicing them at an angle as shown makes for bigger, more attractive slices.


Slice the tomato as thinly as possible and arrange the sausage and tomato slices in even layers over the tomato sauce.


The red onion could also be sliced and arranged in a layer. I prefer, however, to moderately finely dice it and scatter it over the pizza. The flavour distribution definitely seems to be better.


It is important that the mozzarella cheese used for any type of pizza is the firm type, normally labelled pizza mozzarella. The soft mozzarella, usually sold in ball form in brine, is not suitable for this purpose. The mozzarella cheese should be sliced and chopped and the cheddar or other hard cheese should be coarsely grated.


Scatter the two types of cheese evenly over the naan bread pizza. Season with some freshly ground black pepper. Put in to the hot oven for ten to twelve minutes until the cheese has melted and started to bubble. Garnish with the torn basil leaves and serve immediately.


Saturday, 6 August 2011

Beef and Turkey Sloppy Joes with Homemade Fries


What are Sloppy Joes? That is a question a great deal of people outwith North America will be asking when they see the title of this post and one which I myself would not have been able to answer a mere few weeks ago. Sloppy Joes - for those who don't know - are an American comfort food, consisting usually of ground (minced) beef, onion, tomato ketchup or paste and a number of seasonings or sauces, served in a bread roll or burger bun. It was only when I heard reference to them on TV recently that I did a bit of Google work and discovered more about Sloppy Joes. As usually happens in such instances, I determined to come up with my own version and that is what follows today. Given that I have taken a few liberties with traditional recipes for Sloppy Joes, perhaps I should rebrand these as Sloppy Gordons...???

The quantities listed in this recipe will provide for two adult portions (or perhaps four child portions.)

Ingredients

1/2lb minced/ground beef
1/2lb minced/ground turkey
1/2 green bell pepper
1/2 small red onion
1/2 stick of celery (narrow half)
1 clove of garlic
8oz (small) can of chopped tomatoes in tomato juice
2 tbsp tomato puree/paste
1 tsp Dijon mustard
Salt and freshly ground black pepper
2 soft bread rolls
4 large lettuce leaves
2 medium baking potatoes
2 tbsp coleslaw (optional)

Method

The homemade fries in this recipe are actually British style chips and it is necessary to start the chips first. Peel the potatoes and slice and chop in to chips. Add them to a pot of cold water, bring the water to a boil and simmer for five minutes only. Drain the chips through a colander and immerse them in a bowl of cold water, also for five minutes. Drain and put in to a Tupperware container and the refrigerator for half an hour.


Remove the chips from the refrigerator and pat them dry using a clean tea towel as shown above. Fry in hot oil for five minutes. Drain on kitchen paper, allow to cool and put them back in to the dried Tupperware dish and the refrigerator while you make your Sloppy Joes.


Put the beef and the turkey in to a large pot. Heat on medium, stirring with a wooden spoon, until the meat is evenly browned. This will take three to four minutes. Thinly slice the green bell pepper and the red onion. Slice the celery across the way to a thickness of between quarter and half an inch. Peel and grate the garlic clove. Add the vegetables to the browned meat and heat for a couple of minutes, stirring all the time.


Pour the tomatoes in to the pot and add the tomato paste. Turn up the heat to bring to a simmer then reduce to simmer gently for twenty minutes. When the Sloppy Joe mix is about five minutes short of being ready, the chips should be put in for their second and final five minute fry.


Wash and dry the lettuce leaves and lay two at one side of each serving plate. Cut the rolls in half horizontally and lay the bottom half on top of the lettuce. Spoon half of the meat mixture on to the bottom of each roll, deliberately allowing it to spill over the edge to help bolster the sloppy effect. Place the top of each roll gently in place.


The coleslaw is optional and if you prefer, you can serve your homemade beef and turkey Sloppy Joes purely with the homemade fries. Traditionally, Sloppy Joes are eaten by hand, so given that this was my first ever encounter with a Sloppy Joe, I felt obliged to eat it in the traditional fashion. Unfortunately, I chose to do so while wearing a white shirt - big mistake...

I was delighted the way these Sloppy Joes turned out and thoroughly enjoyed this new eating experience. I hope that this version appeals to you and that even if you are a Sloppy Joes expert, you will give this way of preparing them a go.