Saturday, 13 October 2018

Spicy Spanish Tortilla with Mixed Veg

Spicy Spanish tortilla half with mangetout and stem broccoli

A Spanish tortilla is simply a thick omelette, traditionally made to include onion and potato. It is nothing to do with the crisp like tortilla chips sold in foil bags in supermarkets. They are usually an inch or more thick and are cut in to wedges (like pizza) to serve, either hot or cold. I've made this one a little bit thinner to suit my purpose at the time. This recipe also sees the addition of some dried basil and smoked paprika to give the dish a little bit of extra herb and spice flavour but both are optional. It can be served with your veg of choice but the mangetout and tender stem broccoli served in this instance came conveniently together in a pack from the supermarket and were super quick and easy to cook.

Ingredients (Serves 2)

7 or 8 baby new potatoes
Salt
3 large eggs
White pepper
Generous pinch dried basil
1/2 teaspoon smoked paprika
Olive oil
1 medium red onion
Handful mangetout
Handful tender stem broccoli stalks

Directions

Wash the potatoes but leave them unpeeled then cut them in half. Add the pieces to a pot of cold salted water and bring the water to a simmer for about twenty minutes or until the potatoes are just cooked. Drain and set aside to steam off while you prepare the eggs and fry the onion. Note that it's not necessary for the potatoes to cool but letting them steam off and lose the extra moisture is essential. Alternatively, you could cook them in advance and store them in the fridge overnight to save time on the night you are eating. They would have to be fried a little longer at a later stage in this recipe in that case to heat them through.

Boiling halved baby new potatoes

Break the eggs in to a bowl and season with some salt, white pepper, the basil and the smoked paprika. Beat with a fork or small hand whisk until just combined.

Put your kitchen grill (broiler) on to preheat to its highest setting.

Eggs and seasonings for tortilla

Peel the onion and cut it in half down through the core. Lay each half flat on your chopping board and slice to around a quarter inch. Pour two or three tablespoons of olive oil in to a large non-stick frying pan or skillet and bring it up to a medium heat. Add the onion and fry it off over a medium heat for two or three minutes until the strands are separated and just starting to soften.

Starting to fry onions

Add the potatoes to the pan and fry for a further minute or two to just slightly crisp the edges (remember to fry for an extra minute or two if the potatoes have been allowed to cool).

Potatoes are added to lightly fried onions

Ensure the potato and onion pieces are fairly evenly distributed around the pan before carefully pouring in the egg mixture.

Spicy egg mixture is poured over potatoes and onion

Wash the mangetout and stem broccoli before adding to a pan of salted boiling water. Simmer for three minutes before draining at your sink through a colander.

Mangetout and stem broccoli are added to boiling salted water

After a few minutes, you will see the egg is set almost all the way to the top. At this stage, put your pan under the hot grill for a minute or two to complete the setting of the eggs.

Tortilla is almost cooked and ready to go under the grill

When the pan comes out from under the grill, you will see that the eggs have risen slightly as well as set.

Spicy Spanish tortilla

Remember not to cut the tortilla in the pan with a metal knife or you will likely damage and ruin the pan. Either slide it on to a plate for cutting or cut with a plastic spatula. It should be soft enough to do this no problem. Lay half the tortilla on each of two serving plates before adding the drained vegetables.

Tortilla half is plated

Friday, 10 August 2018

Spicy Beef Conchiglie Pasta

Conchiglie pasta in a spicy beef sauce with fresh Parmesan cheese

A dish simply described as pasta in a beef based tomato sauce will almost inevitably have most people thinking of spag bol. While this is entirely understandable, it is a great shame as there are so many different types of pasta out there and so many ways in which a beef based tomato sauce can be adapted to incorporate a whole range of different flavours. This conchiglie pasta in spicy beef sauce is just one simple example of this adaptation.

Beef is added to a pot and seasoned

Ingredients (Serves 2)

1/2 pound minced/ground beef
1 tablespoon vegetable or sunflower oil
Salt and black pepper
1/2 medium sized red onion
1/4 each of red, green and yellow bell peppers
1 large garlic clove
14 ounce can chopped tomatoes in tomato juice
1 teaspoon smoked paprika
Splash of Tabasco sauce (optional)
2 coffee mugs of dried conchiglie pasta
Freshly grated Parmesan cheese to garnish

Beef is carefully browned over a medium heat

Directions

Pour a little vegetable or sunflower oil in to a large pot, just to start the beef off before the fat starts melting. Add the beef and put the pot on to a low to medium heat. Use a wooden spoon to break the beef up and stir it around. As the fat is slowly released, the heat can be increased until all the beef is evenly browned.

Onion, peppers and garlic are added to browned beef

Slice the onion half thinly and add it to the beef along with the seeded and diced peppers. Peel the garlic clove and finely dice before also adding this to the pot. Stir around for a couple of minutes over a low to medium heat, just until the onion is starting to soften and glisten.

Tomatoes and spice are added to browned beef and vegetables

Pour the tomatoes in to the pot and add the smoked paprika. If using the Tabasco sauce, add a few drops at this stage but do be careful - it is potent and powerful stuff!

Spicy beef sauce is brought to a gentle simmer

Stir the tomatoes and spices in to the sauce and bring to a very gentle simmer for fifteen to twenty minutes.

Cooked and drained conchiglie pasta is added to spicy beef sauce

The pasta should be added to a large pot of heavily salted water to simmer for seven or eight minutes. It should then be drained and allowed to steam off and dry out. When the sauce is ready, tip the pasta in to the sauce pot.

Conchiglie pasta is carefully stirred through beef sauce

Use a wooden spoon to gently stir the pasta through the sauce before spooning the combination in to two serving plates and garnishing with some freshly grated Parmesan cheese.

Conchiglie pasta in spicy beef sauce is plated

Friday, 3 August 2018

Lambs Liver with Twice Baked Potato

Lambs liver with minted twice potatoes, carrots and Brussels sprouts

Mint sauce is a well established accompaniment to lambs liver but this recipe takes the pairing of lamb and mint that one step further by also incorporating mint in the starch element of the dish in the form of a twice baked potato.

Ingredients (Serves 1)

1 medium to large baking potato
Butter
Generous pinch dried mint
Salt
4 or 5 Chantenay carrots
4 or 5 Brussels sprouts
3 medium slices lambs liver
Black pepper
Vegetable oil for frying
Mint sauce

Potato is skewered for baking

Directions

Put your oven on to preheat to 220C/450F/Gas Mark 8.

Wash the potato well and dry with kitchen paper. Take a metal skewer and carefully insert it through the middle of the potato long ways as shown. The metal skewer conducts heat to the centre of the potato and makes for more even cooking. Pierce the potato several times with a fork to allow steam to escape during cooking.

Foil wrapped potato is ready for the oven

Wrap the potato carefully in tinfoil and twist the ends. Sit it on a baking tray and bake for one hour to one hour and fifteen minutes, depending upon the size of the potato, just so as it is cooked all the way through.

Halved baked potato

Take the potato from the oven but don't switch the oven off - you will need it for the second part of the cooking process. Protecting your hands with oven gloves, unwrap the potato and pull the skewer free. If the potato is cooked, the skewer should easily come out. Cut the potato in half length ways with a very sharp knife.

Flesh is scooped out of potato halves

A teaspoon is best used to scoop most of the flesh from each potato half and add it to a small mixing bowl. You want to leave to half shells around an even half inch thick. Add about one ounce (1/4 stick) of butter to the potato flesh along with the pinch of dried mint and some salt. Mix well to combine.

Buttered and seasoned filling is scooped back in to potato halves

Divide the potato flesh mix between the two skin cups and spread out evenly. Try to leave the top slightly uneven with peaks to let them crisp up as they cook. Return to the oven for twenty more minutes.

Chantenay carrots are put on to reach a boil

Wash and top the carrots and add them to a pot of cold, salted water. Bring to a simmer for fifteen minutes.

Brussels sprouts are added to partly cooked carrots

When the carrots have been simmering for five minutes, add the washed and trimmed sprouts to simmer with them for the final ten minutes.

Seasoned lambs liver is added to heated frying pan

Carefully wash the liver and pat dry with clean kitchen paper. Season on both sides with salt and pepper. Bring a little oil up to a medium heat in a non-stick frying pan and add the liver to fry for three or four minutes on their first side, depending upon thickness.

Liver is turned in frying pan to fry on second side

Turn the liver slices to fry for a similar length of time on their second sides.

Butter is added to drained sprouts and carrots

Drain the carrots and sprouts through a colander at your sink and return to the empty pot. Add a little butter and gently swirl the pot to ensure even cooking. Plate the meal components and finish off with a teaspoon or two of mint sauce on top of the lambs liver.

Liver, baked potato, carrots and sprouts are arranged on serving plate

Wednesday, 31 January 2018

Curried Baked Chicken and Pineapple

Curried chicken breasts are baked with pineapple and served with turmeric spiced boiled potatoes

Chicken and pineapple is a very popular combination in many Asian dishes but it is perhaps more commonly combined as part of a stir fry rather than baked this way in the oven. The idea is a simple one however - with few ingredients and little work - and worked really well, with the chicken coming out of the oven super tender and delicious and the pineapple rings entirely holding their shape.

Ingredients (Serves 1)

2 chicken breast fillets
2 teaspoons medium hot curry powder
Salt and pepper
2 pineapple rings (canned in own juice)
7 or 8 baby new potatoes
1 teaspoon ground turmeric

Curry powder and seasonings are added to chicken breast

Directions

Put the chicken breast fillets in to a casserole dish. Scatter over the curry powder and further season with salt and black pepper. Use your fingers to gently rub the seasonings over and in to the breasts, not forgetting the undersides. Cover and leave to dry marinate for a minimum half hour.

Pineapple rings are laid on marinated chicken breasts

Put your oven on to preheat to 200C/400F/Gas Mark 6. When the oven is heated, take the lid from the casserole dish and lay a pineapple ring on top of each chicken fillet. Replace the lid and put the dish in to the oven for twenty-five minutes.

Turmeric and seasonings are added to baby potatoes

When the chicken has been in the oven for ten minutes, wash the potatoes, cut them in half and add them to a pot. Season with the turmeric and some salt and pepper. Pour enough water in to the pot that the potatoes are comfortably covered and bring to a simmer for twenty minutes.

When the chicken comes out of the oven, use a skewer to ensure the juices run clear then set aside to rest for ten minutes while the potatoes complete cooking. Drain the cooked potatoes through a colander or sieve at your sink and plate up the ingredients.

Curry breasts and pineapple are plated with potatoes

Sunday, 21 January 2018

Homemade Pie, Mash and Mushy Peas

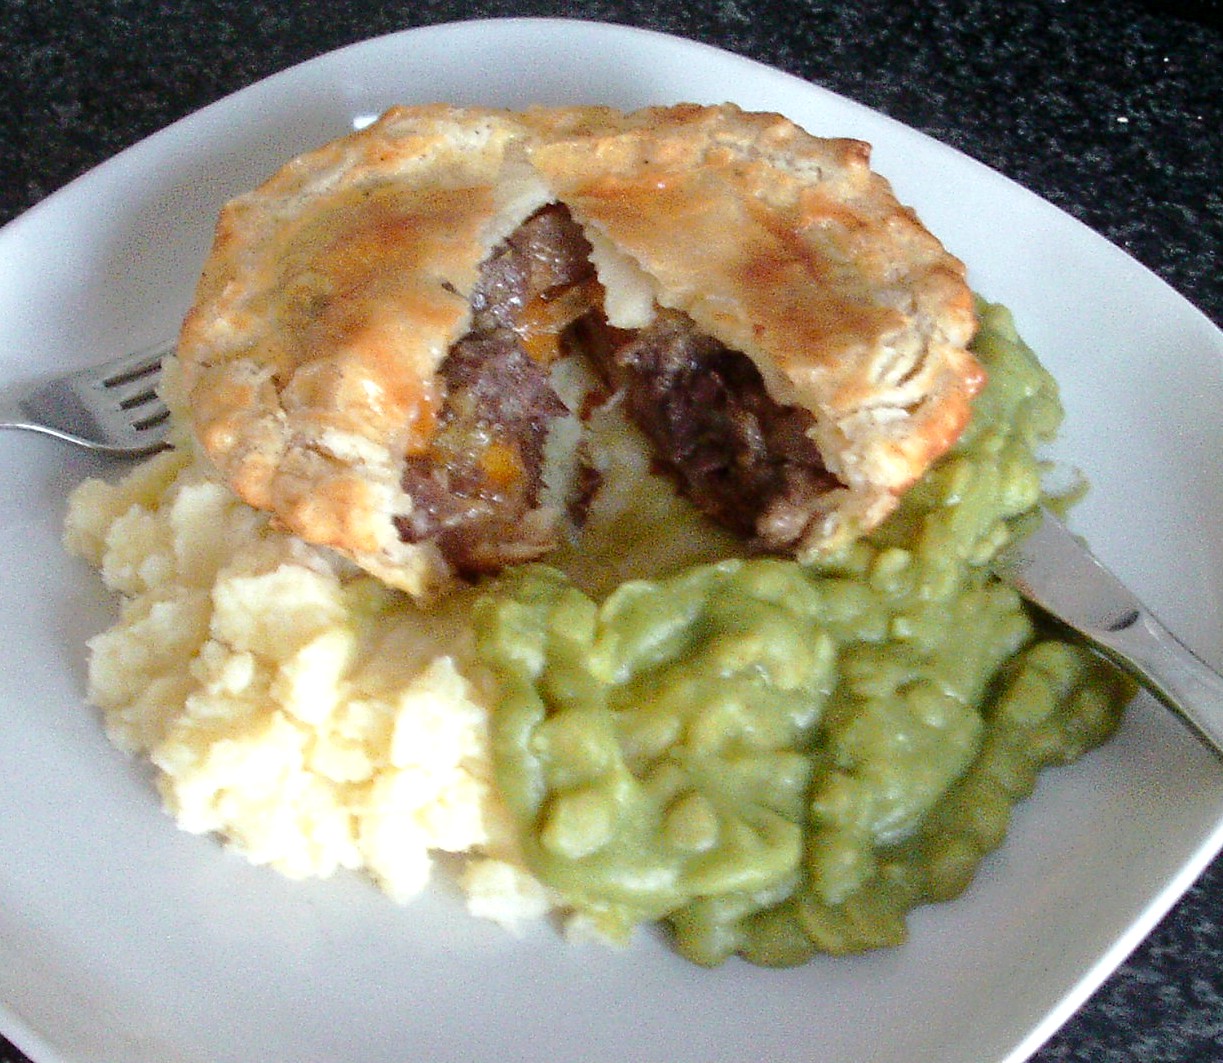
Homemade beef and vegetable pie with mashed potatoes and mushy peas

Pie, mash and mushy peas is a classic British dish, often associated with the sadly now largely gone pie and mash houses of the East End of London. The concept varies slightly depending upon location and interpretation and in the previously referred to retail outlets, the pie and mash was (and in a small few places still is) often served with jellied eels and liquor. The pie in this instance was filled with shin beef and vegetable stew which must be firstly prepared and then left to cool before the pie can be assembled. It may be a good idea therefore to plan this dish in advance, make the stew one night, leave it to cool and refrigerate it overnight in preparation for making and serving the pie the following evening for dinner.

Ingredients (Serves 2)

1/2 pound (225g) shin beef
2 tablespoons vegetable or sunflower oil
Salt and black pepper
1 medium carrot
1 stick of celery
1/2 medium white onion
1 pint fresh beef stock
10 ounces (250g) puff pastry
Flour for rolling pastry
Butter
1 large egg
3 medium to large baking potatoes
14 ounce (400g) can of mushy peas*
Malt vinegar

*You can of course make the mushy peas yourself but I personally find steeping the dried peas and the whole process more trouble than it is generally worth and almost always go for the canned option

Diced shin beef ready for browning

Directions

It may be that you buy your beef already diced. If not, you want to chop it to around three-quarter inch (2cm) chunks. Pour the vegetable oil in to a large saucepan, add the beef and season with salt and pepper. Put the pan on to a medium heat and brown/seal the beef, stirring all the time with a wooden spoon. This should take two to three minutes.

Vegetables are added to browned beef

Scrub, top, tail and dice moderately finely dice the carrot. Wash the celery stick, trim and chop to pieces around the same size as the carrot. Peel the onion half and slice fairly thinly. Add the prepared vegetables to the brown beef and stir well before pouring in the beef stock. Turn the heat up until the stock reaches a simmer then cover the pan and adjust the heat to achieve as gentle a simmer as possible for two to two and a half hours until the beef is super tender. Do check it every so often just to ensure the liquid level is not getting too low. In the unlikely event this should happen, simply add a little boiling water from your kettle.

Beef stew must be left to cool

When the beef stew is ready, it is imperative it be allowed to cool completely before the pies are assembled. If the stew is hot - or even warm - when it is added to the assembly, it will soak in to the pastry and the pies will collapse.
 
One third of the pastry is used to make the pie lid

Put your oven on to preheat to 200C/400F/Gas Mark 6.

The pies should be assembled one at a time, using 5 ounces (125g) pastry in each instance. Lay the first portion of pastry on a chopping board and cut one third of it to roll the lid with the remaining two-thirds to be used to form the base/body of the pie.

Pie dish is used as template for cutting lid

The small ceramic dishes used for assembling these pies are about 3 inches (7.5cm) in diameter and one inch (2.5cm) deep. It is important that you measure the diameter and depth as it will determine the size of the template required for cutting the pastry circle that forms the main body of each pie.

Start by rolling out the lid portion of pastry on a floured board to an approximate square just slightly larger than the upper diameter of the pie dish. The dish can then be used as a template to cut the lid for the pie.

Suitable larger utensil is used to cut pie base and body

You may have to rake through your kitchen cupboards/closets to find a suitable template for cutting the body portion of each pie. You want a circular item around one inch (2.5cm) larger in diameter than the sum of the diameter plus twice the depth of the pie dish.

Roll out the body portion of the pastry to a square just larger than the template you will be using then cut the circle from the pastry in the same way as before.

Pastry discs ready for assembling pie

The inside of the pie dishes require to be greased with some butter. This is to ensure the pies can easily be removed when cooked.

Pie body pastry disc is fitted in to pie dish

The larger circle should be placed in the pie dish and carefully pressed in place to ensure it touches the edges of the dish all round. There should be a slight, regular overhang all the way around.

Cooled beef stew filling is spooned in to pie dish

Spoon enough of the cooled stew in to the dish to almost but not quite reach the brim. Do be sure to include a little gravy to keep the meat moist but not so much that the pastry will become soggy. A tablespoon or so per pie is about right.

Lid is fitted on to pie and glazed with beaten egg

Lay the lid on the pie, tuck it in carefully around the edges and glaze with beaten egg.

Crimped and glazed pie is ready for the oven

Carefully fold over and crimp the pie edges around the perimeter of the lid. Glaze with more beaten egg and cut a small steam vent in the centre with the tip of a sharp knife. Place the pies on a baking tray and in to the oven for thirty to thirty-five minutes until the pastry is beautifully golden.

When the pies are around half way through their cooking time, peel the potatoes and chop to around one and a half inch (4cm) chunks. Do not cut them too small or they will absorb too much water and you will have soggy mash. Place in a large pot of cold water, season with salt and bring to a simmer for twenty to twenty-five minutes until just softened.

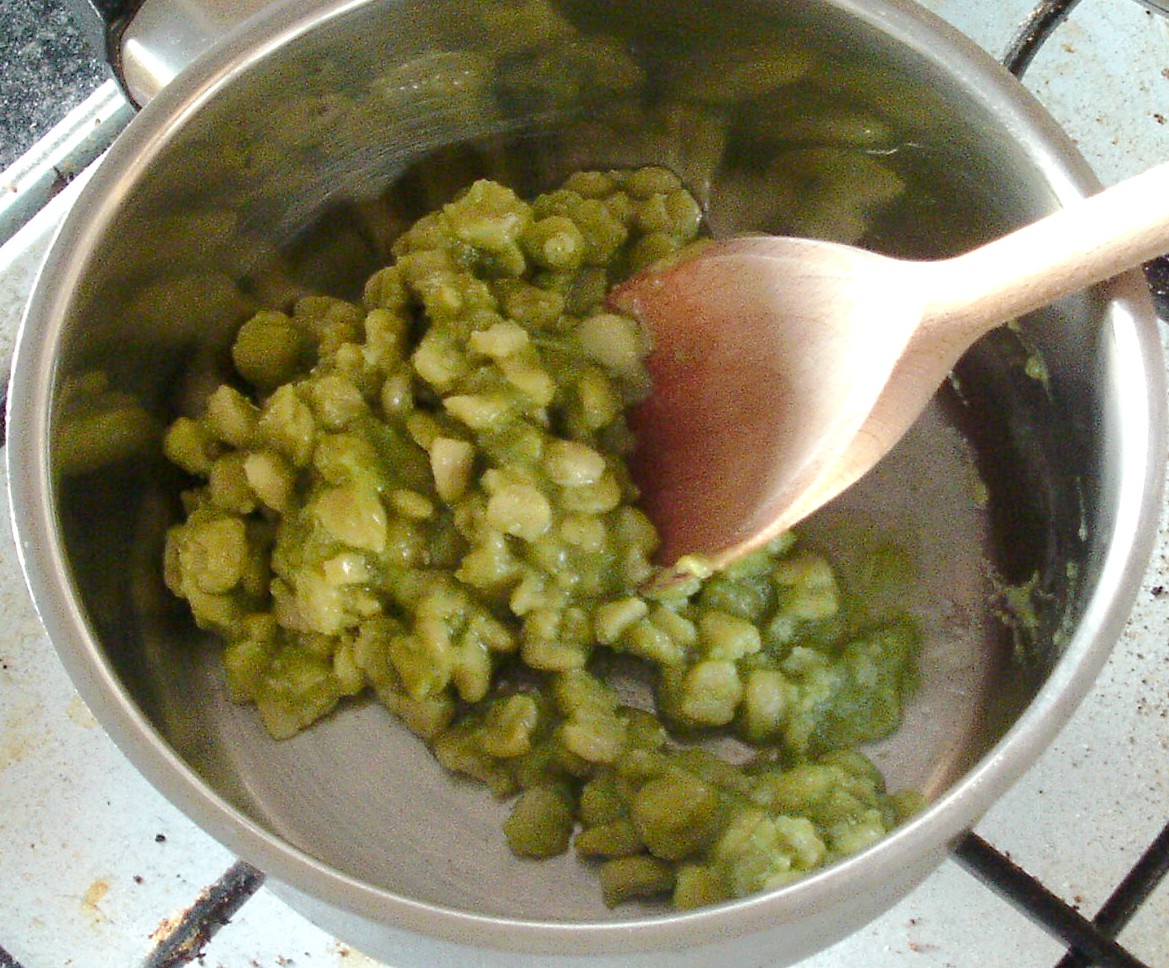
Mushy peas are re-heated in a small saucepan

When the pies are ready, take them from the oven and set them aside (still in the dishes) to rest while you finish the preparation of the mash and mushy peas.

Drain the potatoes when they are softened through a colander at your sink and leave them to steam off for a few minutes. This gets rid of the excess moisture and is a further means of preventing soggy mash.

Pour the mushy peas in to a saucepan and gently heat, stirring occasionally with a wooden spoon. They will only take a few minutes. Season with black pepper and malt vinegar.

Potatoes are hand mashed with butter

Put the potatoes back in to the empty pot and add some butter. Mash with a hand masher.

Mash and mushy peas are plated

Divide the mash and the mushy peas between two serving plates. Carefully loosen the pies around the edges with a blunt edged knife before tipping them carefully out of the dishes in to your hand (protected by a cloth). Lay a pie on each plate and serve immediately.

Pie is plated with mash and mushy peas