Tuesday, 26 October 2010

Baked Potato with Simple Beef Chilli and Cheese


A baked potato is a wonderful idea for dinner, or even for lunch. Baked potatoes are so versatile in what they can be made to accompany that they need never be served precisely the same way twice. On this occasion, I have served the baked potato with a simple beef chilli and some grated cheddar cheese. The chilli can either be prepared in advance and reheated before being served with the baked potato, or prepared as I have done in this instance while the potato is baking.


There are two very common problems experienced when baking potatoes. The first is that the potato remains hard in the middle, while approaching being overcooked on the outside and the second is that the potato is cooked for so long - in order to soften its centre - that the skin and outer part are inedible. There is a very simple way in which I get around these potential problems.

While the oven is preheating to 400F/200C/Gas Mark 6, the potato should be scrubbed under running water and thoroughly dried with kitchen towel. A thin metal skewer should then be carefully driven through the lateral centre of the potato until it protrudes from the other side (see image above.) The metal skewer conducts the heat right through the centre of the potato, allowing and ensuring more even cooking. A fork should be used to pierce the skin of the potato several times to allow steam to escape during cooking and the potato should be loosely wrapped in aluminium foil, to form a sealed tent. It should then be put on to a baking tray and in to the oven for an hour and a half.


The simple beef chilli will take around five minutes to prepare and twenty minutes to cook. Starting to prepare the chilli after the potato has been baking for about an hour should therefore be perfect for having the meal's two principal components ready at the same time.

Ingredients (Serves Two)
1/2lb minced (ground) beef
1 14oz can of chopped tomatoes in tomato juice
1 8oz can of red kidney beans in water
1 yellow bell pepper
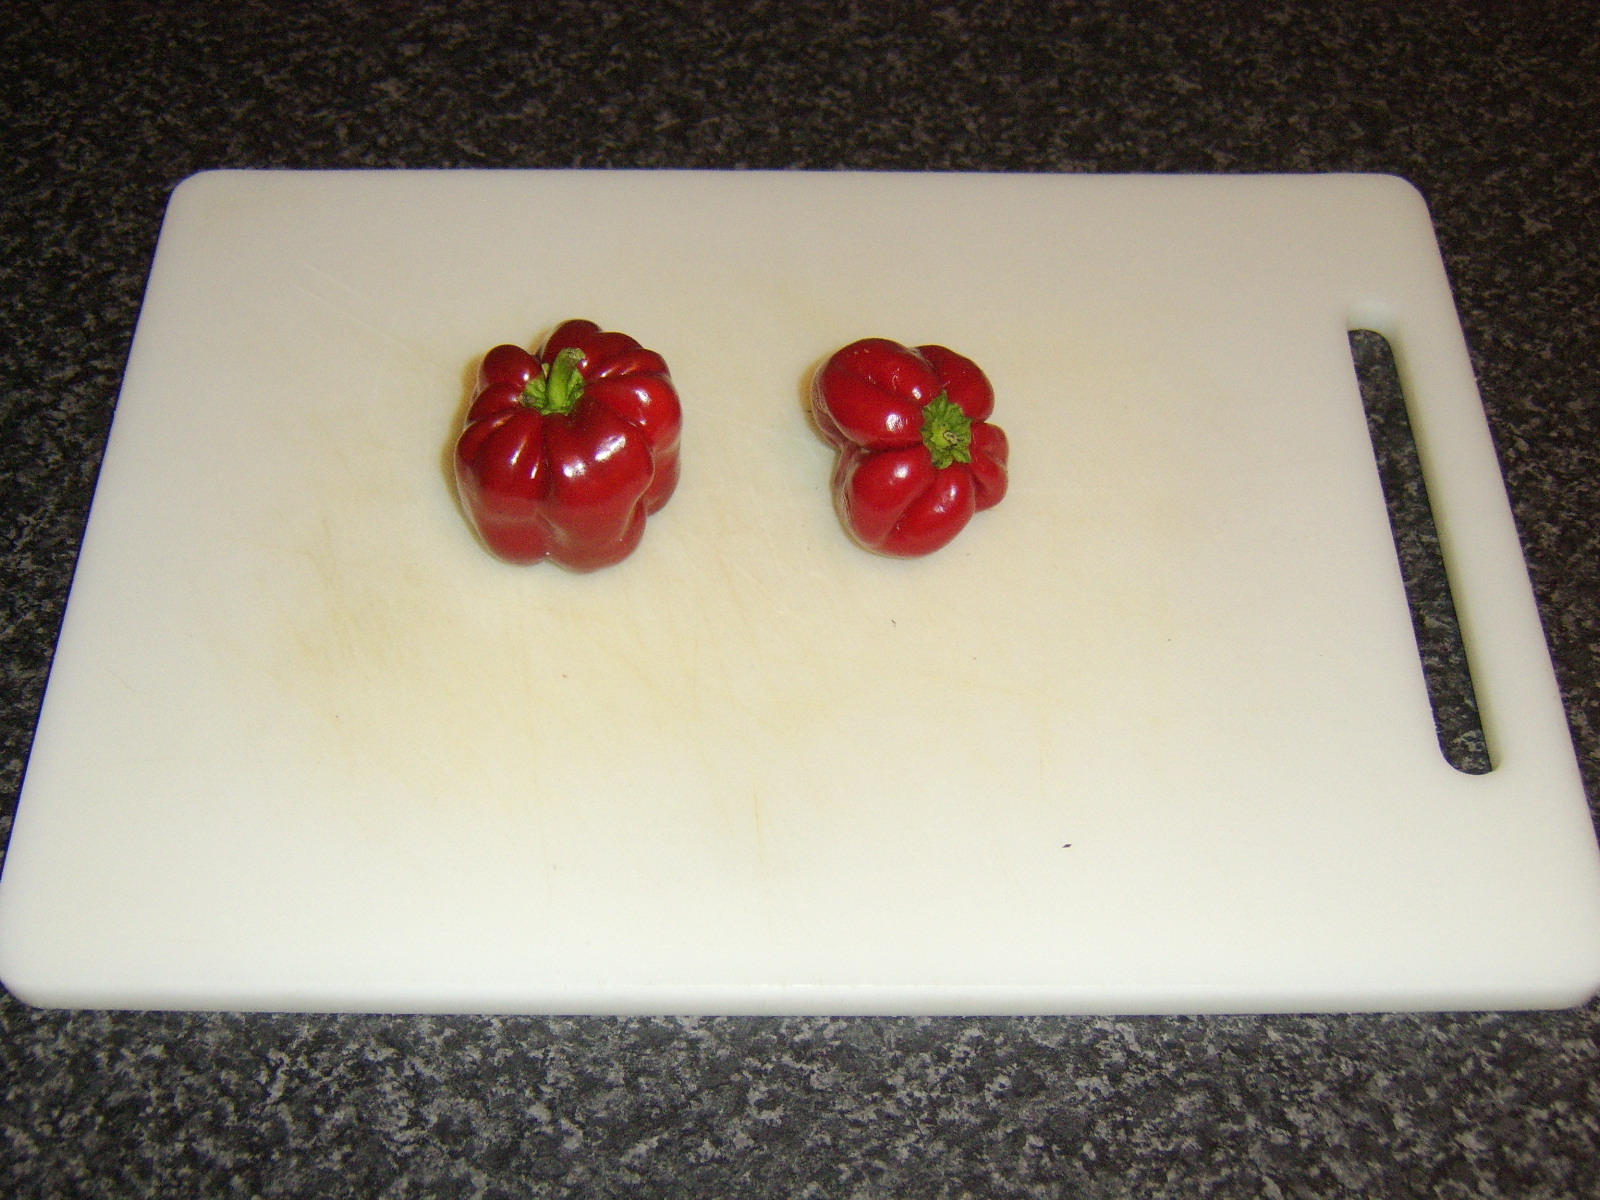
1 red chilli pepper
1 clove of garlic
Salt and freshly ground black pepper

Method

The first step is to quickly brown the mince in a large, dry pan. The yellow bell pepper should be deseeded and roughly chopped. The red chilli pepper should be finely chopped, with the seeds left in for maximum bite. The garlic clove should be peeled and finely chopped. The red kidney beans should be drained through a colander or sieve and washed under running cold water.

When the mince is browned, the peppers and garlic should be added to the pan to sweat off for a couple of minutes before the red kidney beans and chopped tomatoes are added. The heat should be turned up until a simmer is achieved, before being reduced and the chilli left to simmer for around twenty minutes. Seasoning with salt and pepper should be undertaken at the end of the cooking process.

When the potato has been baking for its alloted time, it should be removed from the oven and - before being unwrapped - carefully and gently squeezed (wearing oven protecting gloves) to help fluff up the inside. It should then be carefully unwrapped and if it is cooked properly, the skewer should very easily be pulled free.

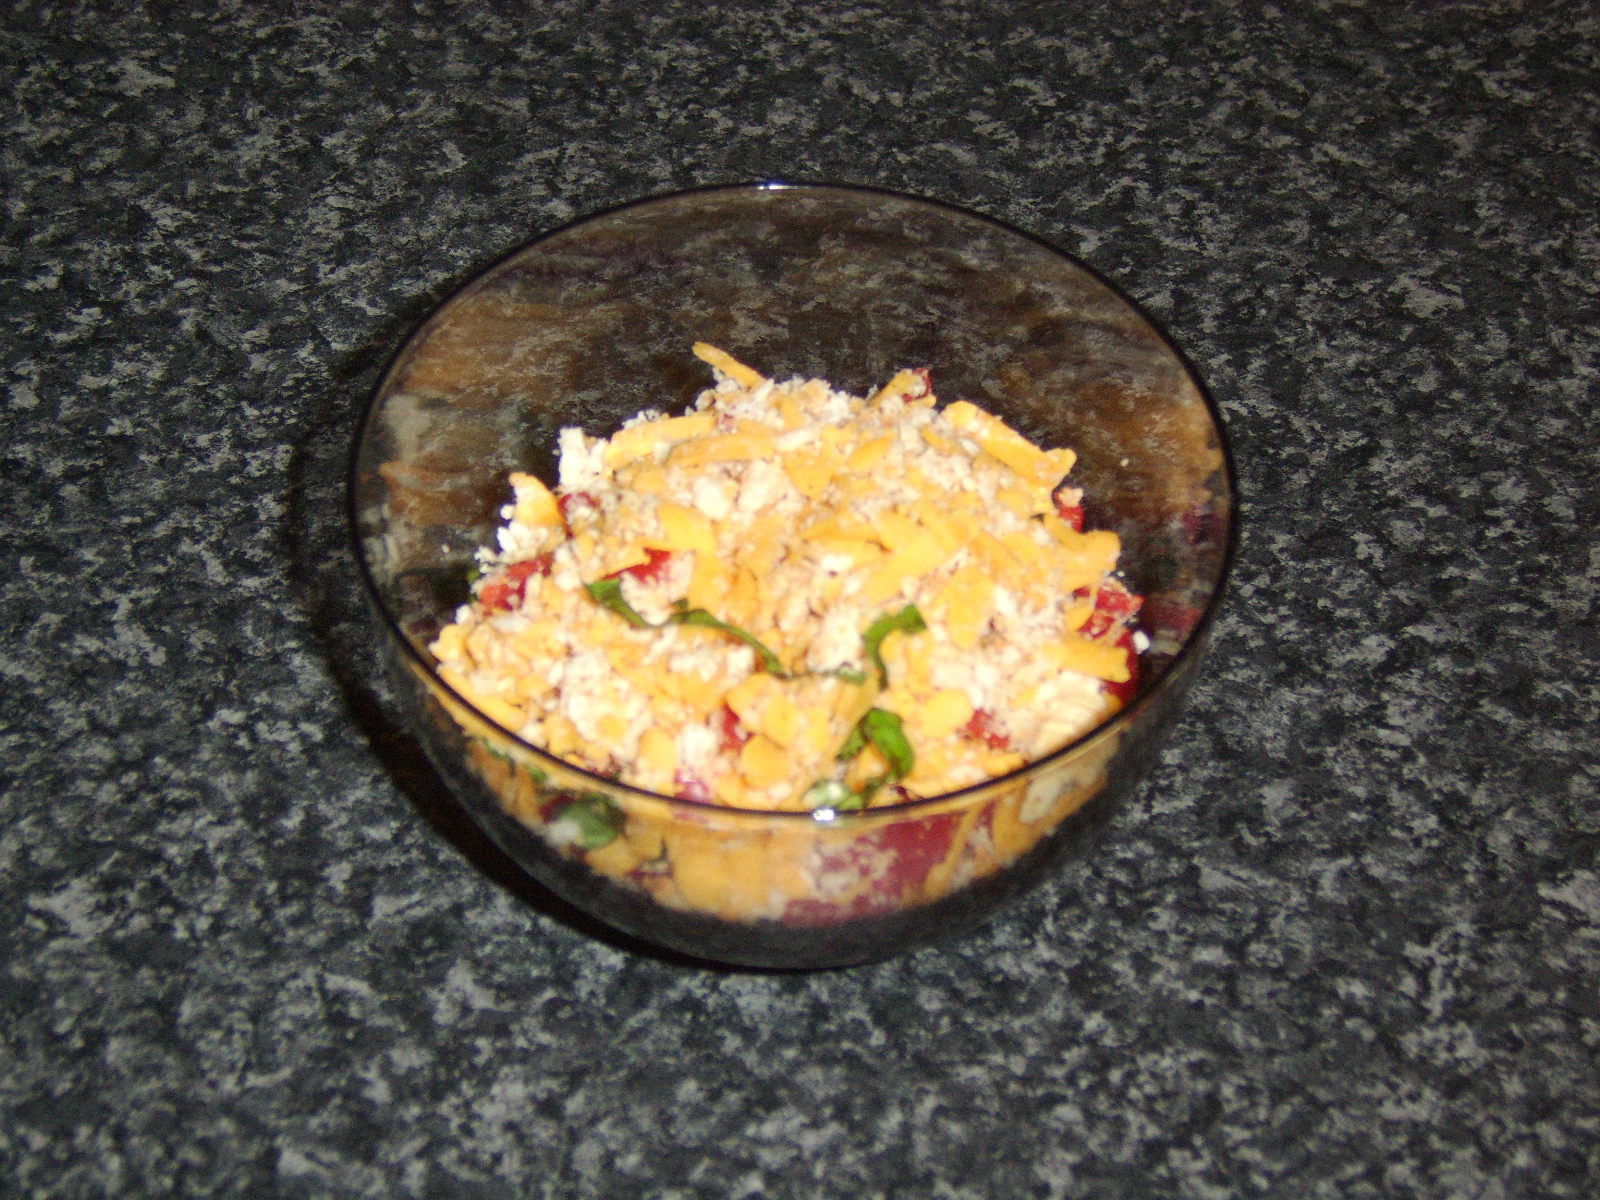
The baked potato should be sat on a plate and cut in to quarters, not quite all the way through. It should then be opened up and the chilli spooned on top, before the optional grated cheese and a couple of basil leaves are added as a final garnish.

Thursday, 21 October 2010

Cheese, Bacon and Pineapple Pasty with Chips


Pasties can be made in so many different shapes and forms but it is a great pity that many people automatically assume that they have to buy pasties pre-prepared and do not consider how easy they are to actually make at home. This is especially true where the puff pastry is purchased already made but the other ingredients are prepared from scratch. This recipe for Cheese, Bacon and Pineapple Pasties falls in to that category.


Ingredients per Pasty

3oz puff pastry
3 medallions (or rashers) of bacon
2oz cheddar or other hard cheese
1 pineapple ring (if canned, should be in own juice and not syrup)
Freshly ground black pepper
Beaten egg for glazing


Method

The bacon has to be cooked and allowed to cool prior to its incorporation in the pasty. This is therefore the first step but the bacon should be cooked and no more, not fried or grilled to the point of being crisp.

When the bacon has cooled, the oven should be put on to preheat to 400F/200C/Gas Mark 6. The bacon should then be sliced to a thickness of about 1/4", the cheese coarsely grated and the pineapple fairly finely sliced. The three ingredients should then be mixed together, with a little freshly ground black pepper. Note that additional salt is unlikely to be necessary, due to the saltiness obtained from the bacon.


The puff pastry should be rolled out evenly on a floured surface to the extent where a 10" dinner plate can be used as a template to cut a perfect circle. The pastry will be fairly thin at this stage but this is deceptive as it will puff up considerably during cooking. The filling should then be spread evenly over one half of the circle, leaving a border of up to 1".


The border of the filled half of the circle should be lightly glazed with beaten egg before the other half of the pastry is folded over and the edges gently crimped. A large baking tray should be greased with butter and the pasty placed on the tray. A cut should be made in the top of the pasty to allow steam to escape during cooking, before it is liberally glazed with the beaten egg and placed in to the preheated oven for 35/40 minutes, until beautifully risen and golden.


The cooked pasty can be served with chips as in this example, or even alone as part of a snack or light lunch. Equally, it may be served either hot or cold.

Monday, 18 October 2010

Honey Roasted Chicken Wings and Vegetables


There are certain nights when we just can not face spending a great deal of time preparing dinner. We may have had a really hard day and just want to stick something in the oven to cook while we flop down in front of the TV, perhaps with a relaxing drink. The temptation in such instances is that we resort to microwaveable meals or similar and that the idea of home cooking is abandoned for the evening.

While nights such as these are often unavoidable, it does not mean that we have to forego our healthy, home-cooked evening meal. This honey roasted chicken wings and vegetables dish requires next to no preparation before it is stuck in the oven to cook, while you enjoy some well earned rest and relaxation.


Ingredients for Two People

12 chicken wings
6 small to medium potatoes
2 small red bell peppers or one normal size
1 medium white onion
2 tbsp liquid honey
1 tbsp olive oil
Salt and freshly ground black pepper


Method

The oven should be put on to preheat to 400F/200C/Gas Mark 6.

The potatoes should be washed but not peeled. They should each then be chopped in half. The bell pepper(s) should be de-seeded and roughly chopped, while the onion is peeled and quartered.

The olive oil should be added to a large baking tray, the chicken wings arranged as shown and the vegetables scattered around them alternately. The items should be liberally seasoned with salt and freshly ground black pepper before the honey is drizzled evenly across the top. The tray should be put in to the oven for fifty minutes to an hour, depending upon how well browned you want your chicken wings to be.


When the cooking time has elapsed, the tray should be removed from the oven and the wings and vegetables divided evenly between two warmed plates.

Sunday, 10 October 2010

Cheese and Herb Crusted Salmon Fillet with Creamed Dill Mash


Salmon represents an extremely tasty and healthy dinner option. It can, however, become slightly repetitive if you like to enjoy its associated benefits on a regular basis. This incredibly simple recipe merely incorporates a crispy crust on top of the salmon fillet, adding a whole new dimension to its presentation and its taste, without significantly adding to the overall cooking time of the combined dish.

Ingredients per Person

2 medium potatoes
1 fillet of fresh salmon (skin on)
1 tsp freshly chopped dill (plus small sprig for garnish)
1 tbsp fresh breadcrumbs
1 tbsp grated cheddar cheese
1/2 tsp freshly chopped basil leaves
1/4 red bell pepper (finely diced)
2 tbsp double (heavy) cream
2 lettuce leaves
1/2 tomato
Flour for dusting
Salt and pepper
Sunflower oil and butter for frying


Method

The first step is to get the potatoes on to boil. They should be peeled, roughly chopped and added to a pot of cold, salted water. The pot should be put on to a high heat until the water begins to boil, then the heat should be reduced to achieve a low simmer for twenty-five minutes.

About ten minutes before the potatoes are due to be ready, some flour should be scattered over a dinner plate and seasoned with salt and pepper. A little sunflower oil and a small knob of butter should be added to a frying pan and put on to a medium heat. The salmon fillet should be patted in the flour on its skin side only, before the excess flour is gently shaken off and it is added to the pan, skin side down.


The breadcrumbs, cheese, basil and red pepper should be added to a small bowl, seasoned with salt and pepper and stirred well. The salmon should be fried on a moderate to high heat until it can be seen that it has cooked approximately two-thirds of the way through from the bottom up. At this time, the heat should be turned off completely and the salmon carefully turned over on to its flesh side, which will allow it to complete cooking in the residual heat only while the topping is added.


The skin of the salmon should have crisped up nicely and be easy to remove with a knife. Take care not to also damage the flesh of the fillet during this process. The breadcrumb and cheese mix should then be patted liberally on top of the salmon fillet. Some of the mix will spill in to the pan but don't worry about this as it will not affect presentation on the plate. The frying pan should then be placed under a hot, overhead grill for just a couple of minutes to melt and crisp the topping.


While the salmon is under the grill, the potatoes should be drained and mashed with the cream and chopped dill. They should then be added to the plate, along with the lettuce and tomato. When the salmon's topping has crisped as required, the salmon fillet should be carefully lifted with a fish slice and sat gently atop the lettuce leaves to complete the dish.

Monday, 20 September 2010

Pork, Pepper and Pineapple Puff Pastry Pie


This is a recipe which came about when I was given a bag of small, homegrown red bell peppers and I wanted to come up with some different ideas for using them in cooking. I first considered a pork, pepper and pineapple stir fry but ultimately decided on this alternative.


Ingredients (Serves Two)

1/2lb diced shoulder of pork
2 small red bell peppers or one normal size
2 rings of pineapple (if canned, in own juice and not syrup)
1 pint of fresh chicken stock
4oz puff pastry
6 small lettuce leaves
2 plum tomatoes
Fresh basil leaves for garnish

1 beaten egg for glazing


Method

The first and most time consuming step is to cook the pork shoulder meat. The meat should firstly be browned in a large pot before the hot chicken stock is added and brought to a simmer. The pork should be simmered for around an hour and a half, to become beautifully tender. Note that the chicken stock may well need topped up with some hot water during the cooking time. Do not let the pork boil dry and remember that some liquid stock will be required in the pie.

When the pork is cooked, the pepper(s) and pineapple rings should be roughly chopped and stirred through the mix. The combination should then be added to a pie dish, as shown above, covered and left for at least half an hour to cool.


The puff pastry should be rolled evenly out on a floured surface to a size slightly larger than is required to top the pie. The cut-offs should then be used to line the edges of the dish before the main pastry is added to top the pie.

A couple of slits should be made in the top centre of the pie to allow steam to escape during cooking. The pie should then be glazed with the beaten egg and added to an oven preheated to 200C/400F/Gas Mark 6 for thirty-five to forty minutes, or until the pastry is beautifully risen and golden.

The pie should be served with the lettuce and tomato and garnished with fresh basil leaves, as shown at the top of this post.

Tuesday, 14 September 2010

Baked Fillet of Pouting with Roasted Potato Wedges and Garden Peas


There will unquestionably be a great many people reading this and thinking, "What is pouting?" Pouting - Trisopterus luscus - is actually a type of fish, a lesser known member of the cod family and one that is not generally considered good to eat. It is usually only caught by mistake by rod and line anglers when fishing for other species and either thrown back in to the sea or used as bait in the hope of a more desireable, alternative catch. I have to be honest in that I too subscribed to this belief until very recently, when I happened to be engaged in my frequent practise of browsing the fresh fish offerings in my local supermarket. When I saw, "Pouting fillets," my initial reaction was that it was some form of joke. Soon realising it was no joke, however, I decided to purchase some and have a first ever go at cooking pouting.


The first big positive of buying and cooking pouting for anyone who is perhaps on a restricted cooking budget is that they are incredibly cheap. The four fillets pictured above cost me only just over £1.00 and are easily sufficient to serve two people. The reason for this is unquestionably due to their lack of popularity and - as I hope to show - is in no way indicative of poor flavour.

Although I knew that pouting were a member of the cod family and that most cooking methods which could be applied to such as cod, haddock or whiting would most likely work perfectly well, I decided to take a quick look at Google for some potential inspiration. I was amazed by the lack of pouting recipes to be found in this normal goldmine of information and although I did find a few appealing suggestions, I decided to go it alone, cook pouting as I would whiting and hope for an at least acceptable result.


The first step in this recipe is to get the potato wedges on to cook. The potatoes I am using here (pictured above) were given to me from a local garden. They are very floury and thus perfect for roasting. Given their long, oval shape, I simply scrubbed them and cut them in half lengthwise.

It is imperative that the potatoes be put in to hot and never cold oil. I therefore added sunflower oil to a deep baking tray (enough to comfortably cover the base) and put it in to the oven, which I turned on to preheat to 400F/200C/Gas Mark 6.


After fifteen minutes, I removed the baking tray from the oven and added the halved potatoes, skin side down. I gently swirled them around to coat them as much as possible in the oil before using cooking tongs to turn them so that they were flesh side down. I then put them in the oven for twenty minutes, at which point I carefully turned them over to expose the flesh side and cooked them for a further twenty minutes.


When the potatoes have been turned, the pouting fillets should be prepared for the oven. A large sheet of aluminium foil should be lightly greased with a little butter. The pouting fillets should be placed skin side down, seasoned with a little salt and a freshly torn basil leaf scattered over the top. This will allow them to infuse with a little extra herb flavour as they cook.


The aluminium foil should then be folded in to form a sealed tent. There should be plenty airspace in the package to allow the steam to cook the pouting fillets. The tray should then be placed in to the oven for eight to ten minutes, dependant upon the size of the pouting fillets. This should of course be done to make the end of the cooking time coincide with that of the potatoes.

The peas which I have served with this dish were frozen. This means that they required to be added to boiling water for a mere three minutes. I put them in to the water immediately before I removed the pouting and potatoes from the oven to begin plating up. A wedge of fresh lemon also makes an optional but attractive garnish.

Sunday, 12 September 2010

Cheesy, Pineapple-y, Super BLT with Fries


It is rare - if ever - that I prepare any type of recipe which could be classed as junk food, either to be published on this blog or anywhere else. I have always believed, however, that the BLT is very unfairly treated in being classed as junk food and that, in theory at least, it is and can be a fairly healthy concoction. The idea for this adaptation of the BLT to a higher level came about one night very recently when I was enjoying a gammon steak with pineapple. I was delighted the way this recipe turned out and I hope that you will try it some time soon.


Preparing the French Fries

I am aware that the way in which I prepare French fries - or British chips - is fairly time consuming and that not everyone will have the luxury of being able to emulate this method. If time does permit, I would urge that you try them this way, but if not, a more traditional cooking method will of course suffice.

In simple terms, I firstly peel the potatoes and then slice and chop them in to French fry shapes. I then add them to a pan of cold, lightly salted water and put them on to a high heat. When the water starts to boil, I reduce the heat to achieve a gentle simmer and allow the fries to simmer for five minutes only.

(Tip - Using a wire basket more associated with a deep fryer, as in the image above, allows the parboiled fries to simply be lifted from the hot water rather than drained. This means that they are less likely to break.)

The fries should be lifted from the water, covered and allowed to cool. They should then be placed in a tupperware dish and refrigerated for at least one hour. After this time, they should be very carefully dried with kitchen towel before being fried in moderately hot oil for five minutes. They should again be drained, cooled and refrigerated for at least one hour.

The fries should be fried for the second and final time in slightly hotter oil at the stage below where the bacon has been put on to cook.


Preparing the BLT

It is important that all of the individual elements for the BLT be prepared in full prior to starting cooking. You will not have a great deal of time between the various stages of this procedure and lack of forward planning could cause significant problems.

Per BLT, you will require:

1 large, soft bread roll (no sugar and salt saturated burger buns!)
2 rashers/slices of bacon
2 leaves of Little Gem or other small lettuce variety
1 slice of beef tomato (approx. 1/2" thick)
1 pineapple ring
1 oz grated cheddar or other hard cheese
2 basil leaves
Freshly ground black pepper


The first step is clearly to cook the bacon. Note that I have used Ayrshire middle bacon in this instance. This bacon is rolled and sliced, rather than cut in to rashers, though traditional bacon will of course work just as well. I have also on this occasion gently fried the bacon in a dry, non-stick pan. The fat of the bacon will melt on an initially very low heat and no other fat or oil is required. The bacon can of course also be grilled for an even healthier effect.

When the bacon is almost ready, the bread roll should be halved and very lightly toasted under a hot overhead grill.


The first stage of assembling this cheesy, pineapple-y BLT is to place the lettuce leaves on the bottom of the bun. The bacon should be gently shaken to remove as much of the fat as possible before being laid on top of the lettuce. The slice of tomato goes on next, to effectively complete what would be a traditional BLT.


The pineapple ring should then be placed on top of the tomato. Note that this pineapple ring did come from a can but was canned in pineapple juice and not syrup. The basil leaves are quickly torn and scattered over the pineapple.


The cheese is the final addition before the bottom half of the BLT goes back under the hot grill. Pressing the cheese down lightly when it is added will help to prevent it slipping off as it is put under the grill. When the cheese begins to bubble, the roll should be plated, given a final seasoning with black pepper only (the bacon will provide sufficient saltiness) and served with the French fries, either open as at the top of this post or closed as below.

Tuesday, 7 September 2010

Schweinhax'n mit Reiberknodel und Sauerkraut


Confused? Well, pictured above is a roasted shank of pork, Bavarian style. It is served with a potato dumpling and sauerkraut, a combination which is particularly popular in the restaurants and beer halls of Munich. Although I have eaten this precise combination in Munich on many occasions, this is my first attempt at making it myself. I will, however, be totally honest and reveal that the sauerkraut is out of a jar. As making sauerkraut from scratch takes several weeks, I decided to leave my attempt in that respect for another time.


Preparing the Pork

The first step in this recipe is to prepare the pork and get it in to the oven. It will take around two hours to roast.

As can hopefully be seen in the image above, I have first of all made two cuts with a sharp pair of scissors along the length of the pork shank, through the skin, at either side of the under part. This will allow the skin to shrink and crisp up on top and expose more of the meat directly to the heat during cooking for a better roasted effect. I then rub the shank all over with salt and quickly seal it all around in a hot, dry frying pan.

The oven should be pre-heated to 325F/170C/Gas Mark 3. One pint of fresh chicken stock should then be heated in a pan until almost boiling. The pork should be placed in a large roasting tray, importantly ensuring that the flatter side with the two cuts through the skin is made to be the underside. Around half of the chicken stock should be poured over the pork before it is placed in to the oven.

The pork shank should be basted every twenty to thirty minutes. The leftover half pint of chicken stock should be kept ready, as it is likely that it will be required during cooking to top up the liquid levels in the tray.


Preparing the Potato Dumplings

The following ingredients will make two potato dumplings, each approximately 3" in diameter.

2 medium potatoes
2 tsp plain (all-purpose) flour
2 tsp farina/semolina flour
2 tsp fresh breadcrumbs
1/2 beaten egg
Pinch of freshly grated nutmeg
Salt and white pepper to taste

When the pork is in the oven, the potatoes should be peeled and chopped. They should be added to a pot of cold water and the pot put on to heat. When the water is boiling, the heat should be reduced and the potato pieces simmered until soft, around twenty-five minutes. The potatoes should then be drained, mashed, covered and left to cool while the pork roasts.


When the pork is ready, it should be removed from the oven to a large plate. Remember that it is imperative to ensure that the pork is fully cooked. The easiest way to do this is to stick a skewer in to the thickest part of the meat and ensure that the juices run clear. The plate should be covered with aluminium foil and the meat left to rest while the potato dumplings are prepared and cooked.


A large pot of water should be put on to reach a boil while the potato dumpling ingredients are mixed together in a large bowl. When the ingredients are thoroughly mixed together - the easiest way to do this is by hand - the resultant dough should then be split in to two equal portions. If the dough appears too wet to hold together in a rolled ball, a little more flour should be added until an effective consistency is achieved. The dough should then be rolled in to spheres and gently deposited in the boiling water. The heat should be reduced to achieve a simmer and the dumplings cooked for fifteen minutes.

When the dumplings are almost ready, the remaining stock from the pork should be reheated to be served as gravy. It should be lusciously thick and tasty. The pork shank can then be added to a large plate, the gravy spooned alongside and the sauerkraut and potato dumpling sat in the bed of gravy. A little freshly chopped dill leaves scattered over the potato as a garnish complete the dish.

A Bavarian Beer is Essential with a Schweinhax'n!


In Munich, a schweinhax'n will often be served with a mass (litre) of local beer. For a true Bavarian experience, therefore, try to get a Bavarian beer from your local supermarket and ensure that this traditional meal is enjoyed to the full.