Sunday, 30 January 2011

Salmon and Coley Egg Bake with Cheese and Herb Crust


This is a recipe comprised of two different types of sustainable fish. Coley is a lesser known member of the cod family which remains plentiful in our seas, while the salmon used in this recipe is farmed. This dish is very easy and fairly quick to make and should serve two people. I have served it with some new potatoes, simmered for half an hour in lightly salted water, and Brussels sprouts, simmered for ten minutes.

Salmon and Coley Egg Bake Ingredients

1/4lb fillet of salmon
1/4lb fillet of coley
2 eggs
2 tbsp fresh breadcrumbs
2oz cheddar cheese
1/4 red bell pepper
1 tsp freshly chopped basil
Salt and freshly ground black pepper
Sunflower oil for frying fish
Butter for greasing baking dish


Method

The salmon and coley fillets firstly have to be cooked by frying them gently in a little sunflower oil in a non-stick frying pan. Depending on the thickness of the fillets, they should take two to four minutes each side. When the fillets are cooked, they should be removed to a plate, covered and left for around ten minutes to cool. They can then be carefully flaked by hand and this is also a good way of removing and discarding any remaining bones.


The fish flakes should be spread evenly in an ovenproof dish, 6" in diameter and 1" deep, which has been liberally greased with butter. The eggs should be broken in to a bowl, seasoned with salt and pepper and beaten to combine. The egg mix should be poured over the fish and the dish placed in to the oven, preheated to 375F/190C/Gas Mark 5, until the egg can be seen to have set. This should take fifteen to twenty minutes.


While the egg and fish is cooking, the cheese and herb crust should be prepared. The cheese should be grated/shredded and the bell pepper finely diced, before being mixed thoroughly with the breadcrumbs and basil in a bowl. When the egg and fish bake is ready, it should be removed from the oven and the topping spread evenly on top. The dish is now finished under a hot grill for three or four minutes, until the topping begins to bubble and brown.


Running a blunt knife around the edges of the coley and salmon bake should free it easily from the baking dish and allow it to be carefully lifted to a plate with a plastic spatula or fish turner. It can then be halved and served with the potatoes and sprouts.


Remember, you can find lots more recipes for salmon, coley and other sustainable fish via the links in the right hand column of this blog and do your bit to help preserve our declining fish stocks.

Saturday, 29 January 2011

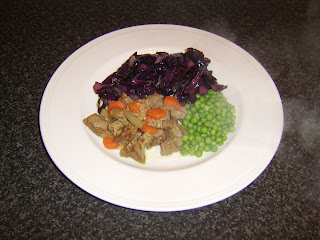
Simple Lamb Stew with Braised Red Cabbage


This is a delicious and incredibly simple stew, perfect for a cold Winter's night. It is accompanied by beautifully braised red cabbage and onion - which is a million miles away from the steamed or boiled cabbage so many of us associate with our youth...

Ingredients (Serves Two)

3/4lb diced leg of lamb
1/4 red cabbage
2 small white onions
1 small carrot
4 tbsp frozen peas
2 pints fresh chicken stock
1 tbsp sunflower oil
Salt and pepper


Method

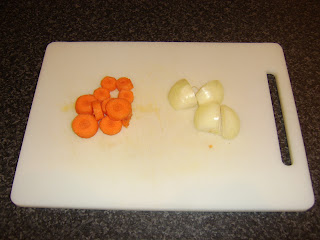
The lamb should be quickly browned and sealed in a dry pot before the chicken stock is added. The carrot should be sliced in to discs, one of the onions peeled and quartered and both of these added to the stew. The stock should be brought to a simmer for about an hour, until the lamb is beautifully tender.


Any remaining hard core should be cut out of the quarter red cabbage and it should be sliced across the way. The second onion should be peeled, halved and sliced. When the stew is almost ready, the sunflower oil should be added to a large pot and brought up to a medium heat. The cabbage and onion should be added, seasoned and stirred frequently over a medium heat for ten minutes until slightly softened.

The peas should be added to a pot of boiling water for three minutes. The stew should be divided equally between two plates with a slotted spoon before the cabbage and peas are arranged alongside.

Saturday, 22 January 2011

Sweet and Spicy Roast Chicken Drumsticks


There are always going to be nights when we are tired, or for some other reason we cannot be bothered cooking anything complex and we just want to put something simple in the oven for our dinner. We want comfort food, that simply lets us sit back and enjoy it, without putting a great deal of work in to the preparation. The temptation in these circumstances is to have a microwaveable dinner, or even a takeaway, but this is one incredibly simple recipe which shows that to be unnecessary. It shows that healthy, wholesome cooking is possible, even in such circumstances. Have a look at how incredibly simple this delicious roast chicken recipe actually is...


Ingredients for One Person

6 small chicken drumsticks
1 tbsp liquid honey
1 tsp hot chilli powder
Salt and black pepper
Fresh basil leaves or other herb for garnish (optional)


Method

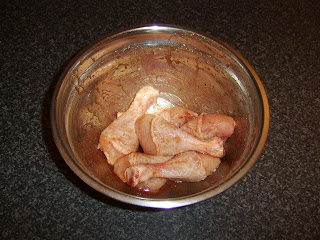
Add the chilli powder and honey to a large bowl or basin and season with salt and pepper. Stir to form a smooth paste. Add the chicken drumsticks and carefully stir them around in the mix to ensure even coating. Cover and leave them to marinate while your oven preheats to 375F/190C/Gas Mark 5. Note that this can be done a couple of hours in advance, if time permits, and the legs refrigerated. This would allow the flavours of the marinade to infuse the meat to even greater effect.


When the oven is heated, spread the legs and marinade evenly on a deep baking tray. Place in to the oven for thirty minutes, turning the drumsticks with cooking tongs after fifteen minutes.


It should be remembered, as with any meat, that it is important to allow the chicken drumsticks to rest when they are removed from the oven. This is best achieved by simply sitting the tray on the hob and covering it carefully with foil, wearing oven gloves, for ten to fifteen minutes. The chicken drumsticks can then be plated and eaten immediately or left to cool and enjoyed cold.

Tuesday, 18 January 2011

Cod Fillet Wrapped in Bacon with Simple Salad


This is an incredibly simple dish, which I prepared with the second half of the bargain cod fillet I obtained yesterday. For those who are wondering why I am cooking with cod when I am advocating, "The Big Fish Fight," campaign, full details can be found in yesterday's post. Essentially, however, my supermarket had sold out of the allegedly cheaper cuts of fish when I visited and I instead had to, "Settle," for a beautiful, bargain priced piece of cod.


Ingredients per Portion

1/2lb fillet of cod
2 rashers of bacon
4 lettuce leaves
6 cherry tomatoes
6 slices of cucumber
1 clove of garlic
3 large basil leaves
1 tbsp extra virgin olive oil
Salt and black pepper
Little sunflower oil for baking

Method

For this recipe, the skin should be removed from the cod fillet, prior to cooking. You could of course ask your fishmonger to undertake this procedure for you but it really is not difficult, provided you use an appropriate knife and follow some simple instructions. Rather than try to describe the technique, I have included a short video below which shows the process carried out. The fish in the video is salmon but the procedure is identical for cod. Click on the arrow in the centre of the screen below to play the video.


When you have finished, you should be left with something like this:


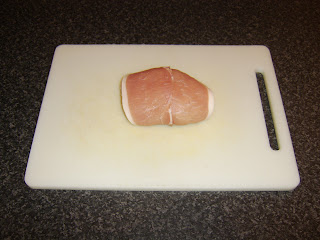
You will see that this particular fillet is not of uniform thickness. What I simply did was tuck the thin flap over the main body of the fillet, before wrapping it carefully in the two rashers of bacon. A little sunflower oil should then be placed on a large sheet of foil and the package wrapped loosely but securely. Put it on a baking tray and in to the oven for 20 minutes at 375F/190C/Gas Mark 5. (Oven should of course be pre-heated.)


The salad can be prepared while the cod and bacon is cooking. The lettuce and basil leaves should be roughly chopped and the tomatoes and cucumber slices halved. The garlic clove should be peeled.


Place the extra virgin olive oil in to a small bowl and grate the garlic in to it. The rest of the ingredients should simply be added, along with some seasoning, and carefully stirred.


When the bacon and cod is ready, the salad should be spread on a plate, the bacon and cod sat on top and a final sprig of basil added as a garnish.

Monday, 17 January 2011

Healthier Option Cod and Chips with Homemade Spicy Salsa


It has to be said that cod is one of the very last things I expected to be eating tonight when I set out for the supermarket this afternoon. Why? Not because I don't love cod - I do! The reason why I did not expect to be eating cod is that I went in search of a cheaper, less popular type of fish, which I intended cooking, eating and publishing here in support of, "The Big Fish Fight," the fish conservation campaign newly featured towards the top of the right hand column of this blog, which is presently garnering a great deal of support here in the UK. I was amazed by what I discovered...


The image above shows a fillet of cod, more than a pound in weight, selling for considerably less than the price I would have expected to pay for it! The supermarket was sold out of coley, the fish I had most particularly gone in search of to cook tonight. I further discovered that the coley - while in stock - had been selling at a higher price than the cod. That must be a historical first. I can only assume that this is an economic knock-on from the campaign, affecting the price of fish at market. Fingers crossed it is a temporary issue and does not cause fish markets and the daily bidding to degenerate in to chaos, fishermen never knowing which catch will fetch the best price...

The recipe, however, is what matters most - on this blog - at this point in time. Needless to say, although my morals were disappointed to have to, "Settle for cod," the rest of me was more than happy to do so. The piece of cod which I purchased will be enough to form two generous portions.

The first step in this recipe is to get the salsa ingredients prepared, mixed together and stuck in the refrigerator for the flavours to have time to infuse.

Salsa Ingredients

1 medium tomato
2" of cucumber
1 clove of garlic
1 red chilli pepper
3 large basil leaves
2 tbsp extra virgin olive oil
1 tsp white wine vinegar
Salt and freshly ground black pepper


Salsa Preparation

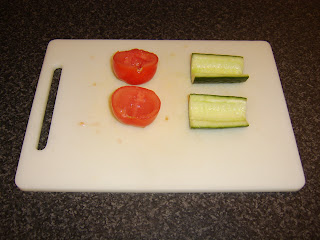
The tomato should be halved and the cucumber likewise, straight down through the centre. The seeds of both should be scooped out with a teaspoon before they are finely diced and added to a mixing bowl or basin. The chilli pepper should be finely chopped (seeds in or out, depending upon preference,) the garlic clove peeled and grated and the basil leaves finely chopped. All should be added to the bowl, along with the olive oil and white wine vinegar. Season, stir well and cover with clingfilm. The salsa can now be refrigerated until the remainder of the meal is ready to serve.


I have prepared my chips as I normally do and have featured the method many times on this blog. In order to avoid excessive repetition, for those who are unfamiliar with my method, full instructions can be found here.


Note that in order to cook cod (or most types of fish) in this way, it is imperative you buy it with the skin still on. The skin will serve as protection during the intensity of the early cooking process and prevent the flesh from damage. When halving the cod as I have done here, you should cut in to it through the flesh with the skin side down. Trying to cut through the skin first will be likely to have disastrous consequences for the fillet and damage it considerably.


Add a couple of tablespoons of plain (all purpose) flour to a dinner plate, season it with salt and pepper and pat the cod fillet in it on the skin side. Bring some sunflower oil up to a fairly high heat in a non-stick frying pan, pat the excess flour off the cod and place it in to the pan, skin side down. It is at this stage you should begin the final frying of your chips.

The thickness of your cod fillet will determine its cooking time but allow ten minutes. Simply watch it from the side to see when it appears to have cooked three-quarters of the way through. You can determine this by watching the colour turn from transparent and slightly pink to white and opaque. When it has cooked to this extent, turn it over and reduce the heat. Around three minutes should be allowed to complete the cooking process.


In the image at the top of this post, I have served the cod with the skin on and a lemon wedge and basil leaves to garnish. If you prefer, you can very easily remove the skin by gently peeling it away and serve it in the fashion below, along with the chips and salsa. Do, however, give the salsa a taste and adjust the seasoning if required, immediately prior to service.

Sunday, 16 January 2011

Citrus and Herb Baked Salmon Fillet with Pan Roasted Potatoes


Salmon is often referred to as the King of Fish. This name is appropriate for a variety of reasons, including its superb healthful properties. Eating salmon as part of a balanced diet is highly recommended, not least for the benefits the Omega-3 fatty acids it contains provide. The problem we can encounter with salmon, however, where it is something we perhaps try to eat every week, is that the salmon recipes we have can become boring and stale. Bearing this in mind, I came up with this recipe, which is a simple tweak of a classic salmon recipe but introduces some slightly different flavours which are less common.

Ingredients per Serving

1 piece of salmon fillet
1 large potato
6 or 7 Brussels sprouts
4 thin slices of lime
3 basil leaves
Salt and white pepper
Sunflower oil

Method

These pan roasted potatoes are prepared in a similar way to how I prepare chips/French fries but I don't bother with the refrigeration step in this instance. It is still necessary to begin preparing the potatoes, however, well in advance of anything else.

The potato should be peeled and chopped in to manageable sized pieces. The pieces should be placed in to a pot of cold water, brought to a boil and simmered for twenty minutes. They should then be carefully drained and returned to the pot with more cold water to cool.

When the potatoes are cool, they should be thoroughly drained and carefully patted dry in a clean tea towel. They should be given their first deep fry in sunflower oil for about six or seven minutes until they only just begin to colour. They should be spread on some kitchen paper and covered to cool while the remainder of the meal is started.


The salmon is going to be baked in a foil parcel. A little sunflower oil should be added to the centre of a large sheet of tinfoil in a baking tray. The salmon should be placed skin side down on the oil. The sunflower oil is simply to prevent it from sticking to the foil and spoiling presentation. Three of the slices of lime should be laid on top of the fillet, each holding a basil leaf in place as shown. Salt and white pepper should be used to lightly season. The package should be wrapped loosely but be sure it is sealed and the tray placed in to the oven - preheated to 375F/190C/Gas Mark 5 - for twelve to fifteen minutes, depending upon the thickness of the fillet.


The Brussels sprouts should be washed and any loose or damaged leaves removed and discarded. They should be added to a pot of boiling, slightly salted water and simmered for ten minutes only. When the sprouts have been on for five minutes, the potatoes should be put back in to the deep frier for a further five minutes or until golden brown.


The baking tray should be removed from the oven and the foil very carefully opened. Beware of escaping steam. The lime slices and basil leaves should be removed and discarded and the fillet transferred to the serving plate with a fish slice. The sprouts should be drained and added to the plate, while the roasted potatoes should be drained on fresh kitchen paper before being added alongside.

In the image at the top of this post, I have used the fourth lime slice to make a small twist as a final garnish. Alternatively, as below, the salmon fillet can merely be served with the lime and basil with which it cooked still in place.

You can find more of my healthy salmon recipes by clicking here.

Saturday, 15 January 2011

Beef, Garlic and Bell Pepper Stew


The number of people I have spoken to this week who have been suffering from the common cold has been staggering. Determined not to succumb myself, I decided to take some serious preventive action. No, I did not visit the local chemist's shop/drugstore, I turned to Mother Nature herself for assistance...

Garlic. The oft labelled, "Stinking Rose." The health benefits of garlic are many and profound. The problem is that some of them can be destroyed/affected by cooking, especially if the scourge of healthy eating - a microwave oven - is used. You can find a very informative article on the subject by Dr Kristie Leong by clicking here.

This dish is based upon one which I remember tasting in the beautiful, medieval town of Prachatice in the Czech Republic. On that occasion, if memory serves me correctly, the beef and garlic stew had a name indicating the fact that there were no fewer than forty cloves of garlic in it. This recipe has but seven cloves per serving but it should be noted that the garlic cloves are mostly cooked whole. This gives them a sweet, milder flavour than most people associate with garlic. What I also did, though, was keep one clove back until near the end, to ensure the principal health benefits were obtained to at least some extent.

Ingredients per Portion

6oz shin of beef
1 green bell pepper
1 red bell pepper
7 cloves of garlic
1 small white onion
2 pints of fresh beef stock
Salt and pepper


Method

The shin of beef should be cut in to bite sized pieces. Do not discard any of the fat. The beef should then be added to a large pot and quickly browned and sealed over a high heat. There is no need for fat or oil. The beef stock should be brought up to a simmer in a separate pot.


When the beef is browned, the onion should be peeled and quartered, the green pepper only deseeded and sliced in to 1/2" strips and six of the garlic cloves peeled. These ingredients should be added to the pot and stirred around in the beef before the stock is oiured in. The stock should be brought to a simmer and the stew left to simmer for an hour and a half. It should be stirred occasionally and the liquid level checked. The stock can be topped up with a little boiling water if necessary.

The garlic, onion and the green bell pepper will largely break down and thicken the stew during this time, so adding the red bell pepper (deseeded and sliced) after an hour and a half will reintroduce some body and bite to the mix. A further half hour's simmering should see the beef deliciously tender. The final garlic clove should be grated in to the stew five minutes before it is ready. The stew should be tasted and seasoned prior to being served.

This stew could be served with potatoes, or a number of different vegetable accompaniments. I have in this instance, however, served it simply with some crusty bread. The bread can be served as is or you may like to put a little extra spin on it.


Slice the bread to about a thickness of 1". Grate/shred some cheddar cheese and mix it with a little dried sage and black pepper. Spread the cheese on the bread and toast under a hot, overhead grill until the cheese melts and begins to bubble.