Tuesday 31 May 2011

Chicken Tikka Masala Recipe


Chicken tikka masala is the UK's favourite curry and is now popular around the world. The origins of the dish are unclear, with some people believing that the dish was actually created in the UK and doesn't know its origins in India at all; other people claim that although it is a recent invention, it was devised in the Punjab, in India. Irrespective, it is a dish for which recipes vary hugely, with virtually the only ever present ingredient being the chicken. The chicken would normally be cooked on skewers in a tandoor but this is my own version of chicken tikka masala, for ease of making at home, which came about through a little investigation and a lot of experimentation. I hope you like the finished product which I have produced.

I'm sorry about the rather lengthy list of ingredients for this dish but that unfortunately does tend to be the way of things with authentic curries. I have tried to list them here in the order in which they will be required.

Ingredients for Two Portions

1lb diced chicken breast
2 tsp tandoori curry powder
6oz natural yoghurt
2 tbsp sunflower oil
1 3" cinnamon stick
6 cardamom pods
1 medium white onion
1" fresh ginger root (grated)
3 garlic cloves (grated or crushed)
1 tsp ground cumin seeds
1 tsp ground coriander seeds
1 tsp turmeric
1/2 tsp hot chilli powder (variable depending upon taste)
8oz can chopped tomatoes in tomato juice
Juice of half a lemon
5 fl oz fresh chicken stock
1 tsp garam masala
Salt

5oz basmati rice

Method

The chicken will require to be marinated for at least a couple of hours, or if it is more convenient, this can be done overnight. Add the yoghurt to a large glass bowl along with the tandoori curry powder and stir well to combine. Add the chicken and again stir well. Cover with clingfilm and put in the refrigerator to marinate.


I have served the chicken tikka masala in this instance simply with plain boiled rice. An Indian dish of this type is of course, however, commonly served with a flat bread, such as chapatis. It is incredibly easy to make chapatis at home and if you want to try it for yourself, the recipe link is included below. You will need to start the chapatis just before you start to cook the chicken tikka masala.

How to Make Chapatis


To start cooking the chicken tikka masala, bring a wok or other deep style frying pan up to a very high heat and add the sunflower oil. Half and thinly slice the onion and add it to the wok, along with the cinnamon stick and cardamom pods. Stir fry for three or four minutes before adding the grated ginger and garlic cloves, cumin, coriander, turmeric and chilli powder. Cook for another minute or so before removing and discarding the cinnamon stick and cardamom pods.


Add the chicken and its marinade to the wok. Stir fry until the chicken meat is well and evenly sealed. Add the tomatoes, lemon juice, chicken stock and garam masala. Season with salt (around 1/2 tsp) and bring to a simmer. Continue to simmer for ten to fifteen minutes while the rice is prepared.


Put the rice in to a fine sieve and wash it under running cold water. This helps to remove the excess starch. Bring a large pot of slightly salted water to the boil and add the rice. Leave for one minute, stir well and simmer for a total of twelve minutes. Drain the rice again through the sieve.

The way I have plated the rice here is by lining a small bowl with clingfilm and packing the rice in to it. Lay the serving plate on top of the bowl and invert. Lift the bowl away, peel away the plastic film and spoon the chicken tikka masala alongside. A small sprig of basil makes a colourful finishing touch.

Sunday 29 May 2011

Roast Shoulder of Lamb with Mint Sauce and Roasted Baby Potatoes


Roast lamb is a very common family favourite but it is most often cooked in the form of a large joint, such as perhaps a leg. That is of course of little use to those cooking for only one or two, so this recipe focuses particularly on a smaller scale roast shoulder of lamb, designed to serve only one person. It is important to remember, however, that because the shoulder of lamb in this instance is off the bone, it will shrink significantly during cooking.

Ingredients

6oz shoulder of lamb fillet
6 to 8 baby potatoes
1 tbsp homemade mint sauce
2 tbsp fresh sweetcorn
Pinch of dried mint
Salt and pepper

Method

Put the potatoes (unpeeled) in to a pot and add enough cold water to comfortably cover them before seasoning with salt. Bring the water to a boil and simmer for thirty minutes. Drain the potatoes and place them in to a pot or bowl of cold water to cool.


Place a large sheet of tinfoil on a baking tray. Lightly oil the shoulder of lamb fillet with some sunflower oil, simply to prevent it sticking to the foil before it starts to cook and release its own juices. Place it on to the centre of the foil and season with salt, pepper and the dried mint. Wrap the foil in to a sealed tent. Put the lamb in to an oven preheated to 180C/350F for twenty-five to thirty minutes, depending upon how well done you like your lamb.

When the lamb is almost ready, drain the potatoes and rub the skins off with the ball of your thumb. This should be fairly easy to do. Take the lamb from the oven. Carefully unwrap the foil and remove the lamb to a heated plate. Cover it with more foil and set it aside to rest. Add the potatoes to the juices of the lamb in the foil and turn them around with a wooden spoon to ensure even coating. Turn the oven up to maximum and cook the potatoes for ten minutes.


When the lamb is rested, slice it diagonally and put it on the serving plate. Add the mint sauce and the sweetcorn before taking the potatoes from the oven and plating them immediately prior to service.

Sunday 22 May 2011

Spicy Sausage Casserole with Cheesy Bread


This spicy sausage casserole is an incredibly simple dish, perfect for any night where you can't face spending a great deal of time cooking, or where time is short and you simply want to throw something together, stick it in the oven and be eating within the hour.

Ingredients per Person

4 beef link sausages
1/2 red onion
2 small red chilli peppers
2 cloves of garlic
2 pints of fresh beef stock
Salt and black pepper
Torn basil leaves to garnish


Method

Put your oven on to preheat to 375F/190C. Pour the beef stock in to a pot and heat it gently until it reaches a simmer.

Removing the core from the garlic cloves is optional but be aware that where there is significant core in a garlic clove, it can introduce an unpleasant bitterness to the cooked dish. Slice each clove in half as shown above. Simply pick the core out of each half with the point of your knife and discard. Finely chop the flesh of the garlic and the red chillis. Note that this recipe is fairly hot so you may prefer to use only one red chilli. Slice the red onion.


Place the sausages in to a deep casserole dish. Scatter the onion, garlic and chilli over the top. Season and carefully pour over the heated beef stock. Put the lid on to the dish and place it in to the oven for forty-five minutes.


This spicy sausage casserole can very effectively be served with boiled potatoes and other vegetables. Try serving it, however, in a deep bowl, garnished with torn basil leaves and accompanied by either plain crusty bread or cheesy bread, similar to that pictured above. Below are links to a couple of sites which afford suggestions for various bread recipes, most of which are very simple and quick to prepare and are delicious along with this casserole.

Cheesy Bread Recipes

Bruschetta Recipes

Monday 16 May 2011

Pork Schnitzel, Potato Salad and Trimmed Green Beans Recipe


Schnitzel recipes are normally thought of as relating to Wienerschnitzel, the famous Austrian dish. There are, however, a great many different types of schnitzel, prepared in different ways from a number of different types of meat. Wienerschnitzel is traditionally made from veal (Kalbsschnitzel) and extremely delicious it is; but in this instance, I have made the schnitzel from a pork leg steak. I will be honest in the sense that this was a bit of an experiment but it was absolutely delicious and I hope you will consider giving it a try.

Ingredients per Serving

1/2lb leg of pork steak
1 medium floury potato
2oz trimmed green beans
1 tbsp sweetcorn
1/4 red bell pepper
1 clove of garlic
1 tbsp low fat mayonnaise
3 tbsp fresh breadcrumbs
1 tbsp flour
1 small egg
Salt and white pepper
Chopped flat leaf parsley and half a tomato to garnish (if desired)

Sunflower oil for frying


Method

The potato salad should be prepared in full before the schnitzel is started. Peel the potato and cut to a 1/2" dice. Add the pieces to a pot and cover with cold water. Season with salt and put on a high heat until the water boils. Reduce the heat and simmer for twelve to fifteen minutes until the potato pieces have softened. Drain the potatoes and submerge them in a bowl of cold water for just a couple of minutes to rapidly cool them before again draining them thoroughly. Place them in to a plastic dish with a lid and in to the refrigerator.


Leave the potatoes to cool for at least an hour before removing them from the refrigerator and adding them to a mixing bowl. Add the mayonnaise, the sweetcorn and the red bell pepper, which should be diced to a similar size as the corn. Peel the garlic clove and grate it in to the bowl with a hand grater. Season with salt and white pepper, stir carefully but well and cover with plastic wrap before refrigerating until required.


The pork leg steak will require to be pounded with a meat mallet, prior to being breaded and cooked. This is both to tenderise it and help it cook more quickly. An easy way to do this is to lay a sheet of clingfilm on a chopping board and the pork on top. Season the pork at this stage with salt and pepper. This allows the pounding process to infuse the seasoning through the pork. Cover the steak with a second sheet of clingfilm before gently but firmly pounding the steak to a thickness of between 1/4 and 1/2". Do be careful not to over pound the steak and cause it to break up or tear.


Spread the flour on one dinner plate and the breadcrumbs on another. Break the egg in to a flat bottomed bowl and lightly beat it with a fork. Add enough sunflower oil to a large frying pan to comfortably cover the base and put it on to a medium heat.

Unwrap the pork from the clingfilm and pat it gently on both sides in the flour. Draw it next through the egg mix and finally pat it well on both sides in the breadcrumbs. Transfer it to the frying pan and fry on a moderate heat for seven or eight minutes each side, until the breadcrumbs are beautifully golden and the pork is cooked.


When the pork schnitzel is cooked, turn off the heat and push the pan to the side for the schnitzel to rest while the beans are prepared. Put the beans in to a pot with a little salt and add enough boiling water to comfortably cover them. Bring to a simmer for four or five minutes and drain well.

The schnitzel, potato salad and beans should be plated as shown at the top of this post. The tomato and parsley should be used to garnish the dish before it is then taken to the table.

Looking for More Schnitzel Recipes and Schnitzel Ideas?

You may find the site linked to below to be of interest:

Wienerschnitzel and Assorted Schnitzel Recipes

Tuesday 10 May 2011

Bavarian Smoked Ham, Egg and Beetroot Salad with Tomato and Mozzarella Bruschetta


Bruschetta is an incredibly simple Italian creation, intended as a starter or appetizer. Bruschetta is frequently served with a wide variety of accompaniments but perhaps less often as part of a main course. I thought that as we in the Northern Hemisphere move towards summer and many people start thinking of simple summer salads for dinner at night, it may be worth including here a quick, easy and delicious idea for incorporating bruschetta as a part of a simple and tasty salad meal.

Ingredients per Serving

3 or 4 wafer thin slices of Bavarian smoked ham or similar
3 lettuce leaves
1/2 small white onion
3 small slices crusty bread
1 egg
1 garlic clove
1 small cooked beetroot
3 slices of tomato
3 slices of soft buffalo mozzarella
2 fresh basil leaves
Extra virgin olive oil
Salt and freshly ground black pepper


Method

Please note that it is imperative that you do not attempt to boil your egg straight from the refrigerator. Whatever way you are cooking eggs, for best results, the eggs should always be removed from the refrigerator a couple of hours before cooking in order that they may reach room temperature. This is particularly important when boiling eggs. Click here for some useful tips on boiling eggs which may help you achieve top results every time.

Put the egg in to a small pot and add enough cold water to comfortably cover it. Put it on to a high heat until the water begins to boil. Reduce the heat to achieve a simmer for six minutes.


While the egg is boiling, wash and roughly shred the lettuce leaves. Finely slice the onion half. Season with salt and pepper, mix together and place as a bed on one side of the serving plate. The Bavarian smoked ham slices should be rolled up and laid on top of the lettuce and onion.

When the egg has been simmering for six minutes, put the pot in to the sink and run cold water in to it for around thirty seconds. Lift the egg out with your hand and crack the shell all around by gently tapping it on a hard surface. Carefully peel the egg under running cold water and discard the shell. Put the egg in a bowl of cold water to cool it quickly while the bruschetta is prepared. Cooling the egg quickly in this fashion will prevent the edges of the yolk from turning that distasteful bluish/black colour.


Bruschetta could not really be much simpler to make. The first step is to toast the slices of bread on both sides, under an overhead grill, until golden. While the bread is toasting, peel and lightly crush the garlic clove. Remove the toasted bread from under the grill and carefully rub each slice on top with the peeled garlic clove. Drizzle with extra virgin olive oil, season with salt and pepper and plate.


Place a slice of mozzarella on top of each piece of bruschetta, followed by a slice of tomato. You may have to half the tomato slices, depending upon how big they are. Scatter with torn basil leaves.

Remove the egg from the cold water and pat dry with kitchen towel. Half it carefully and plate. The beetroot should only at this last minute be diced and arranged on the plate, to prevent its juices colouring other ingredients and affecting presentation.

Saturday 7 May 2011

Bacon Wrapped Chicken on Black Pudding with Peppercorn Sauce and Beetroot Salad


Blood sausage, blood pudding, or black pudding - as it is called here in the UK - are all essentially different names for the same product. The ingredients will vary significantly but all have one common principal ingredient and that is blood. Although the idea of eating such a concoction may sound off-putting to many people, black pudding is not only delicious but extremely versatile in the many ways in which it can be cooked and served. Whether you wish to enjoy it as part of a full fried breakfast, or as an accompaniment to chicken as in this recipe, black pudding is something that all who love sausages in particular should at least make the effort to try.

Black pudding by whatever name is not always easy to get a hold of in the USA in particular but Amazon does have a wide range of options in this respect which you may wish to consider:


Ingredients per Serving

1 chicken breast fillet
2 large bacon rashers
2 3" slices of black pudding
Handful of fresh rocket
1 small cooked beetroot
2oz blue cheese (such as Stilton)
3 fl oz double (heavy) cream
1/2 tsp whole black peppercorns
Salt and pepper
Sunflower oil for frying


Method

Beetroot can be bought whole and precooked in vacuum packs from supermarkets. If you are cooking the beetroot, be aware that beetroot does take up to a couple of hours to cook from raw. The beetroot used in this recipe is not pickled, simply boiled in water.

Season the chicken breast and wrap it carefully in the bacon rashers. Place it on to a sheet of tinfoil and wrap the foil loosely to form a sealed tent. Place it on to a baking tray and in to an oven preheated to 400F/200C for twenty-five minutes.


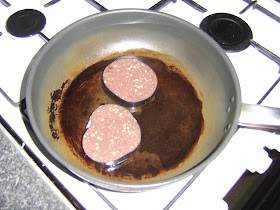
Remove the tray from the oven and set it aside to allow the chicken to rest while the rest of the ingredients are prepared. Add a little sunflower oil to a frying pan and fry the black pudding slices for about three minutes each side on a medium heat until cooked.


The black peppercorns should be cracked with a pestle and mortar but not ground to a powder. They should be added to a small saucepan with the cream and a little salt, which should be put on to a low heat to reach a simmer.


Lay the rocket leaves on the serving plate. Dice the beetroot and blue cheese and scatter over the rocket. Remove any remaining plastic rind from the black pudding and plate it next to the salad. The bacon wrapped chicken can now be unwrapped - careful of escaping steam - and sliced in half at a forty-five degree angle. Place half a piece of chicken on top of each black pudding slice.


When the cream and cracked peppercorns have reached a simmer, give one final, thorough stir, pour over the chicken and serve your meal(s) immediately.

If you want to find more delicious black pudding meal suggestions, you may wish to visit the site linked to below.

Black Pudding Recipes